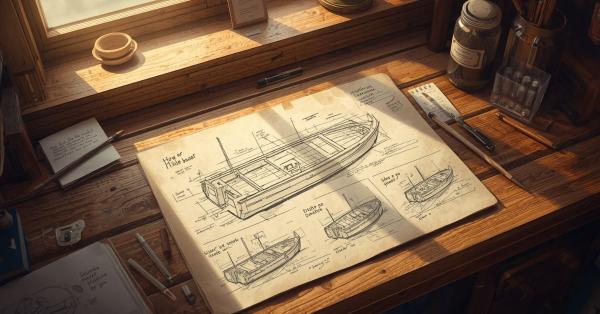
There’s something quietly magical how to draw a boat easy drawing. Maybe it’s the gentle curve of the hull, or the way a single sail can suggest an entire journey across open water. Whatever the reason, boats remain one of the most rewarding subjects for artists of every skill level, simple enough for a beginner to attempt in minutes, yet rich enough to challenge even experienced illustrators chasing realistic light, water, and texture.
This guide walks you through everything you need to draw a boat with confidence, starting from basic shapes and working up to full scenes with waves, reflections, and fine detail. You’ll learn how to construct a rowboat, sailboat, and motorboat from scratch, understand boat anatomy so your proportions look believable, and pick up shading and coloring techniques that bring your drawing to life.
Whether you’re sketching your first boat or refining your tenth, there’s something here for you. Let’s set sail.
Materials & Tools
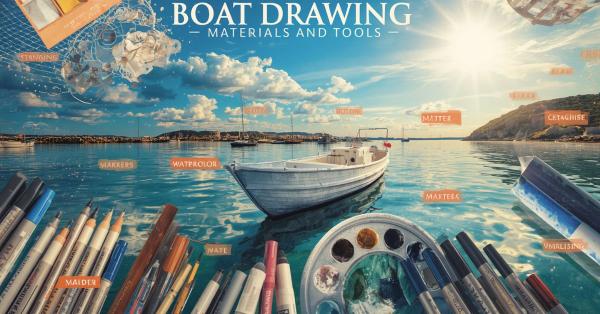
Before you start sketching, it helps to gather a few basic supplies. You don’t need an expensive art kit; most of these items are things you probably already have, and the rest are inexpensive additions that make a real difference in your finished drawing.
Pencils: Start with an HB pencil for your initial construction lines. It’s light enough to erase cleanly but dark enough to see. Once you’re ready to add shading and depth, softer pencils like 2B, 4B, or 6B give you richer, darker tones for shadows and texture.
Paper: Regular sketch paper works fine for practice and pencil work. If you plan to ink or add watercolor later, switch to a heavier paper like bristol board or watercolor paper, which won’t buckle or bleed through.
Erasers: Keep two types on hand: a kneaded eraser for gently lifting graphite without smudging, and a vinyl eraser for cleaner, more precise corrections.
Inking tools: A fine-liner pen (0.3mm–0.5mm) is ideal for clean outlines, while a brush pen adds expressive, variable line weight for a more dynamic finished look.
Coloring mediums: Colored pencils are great for soft, blendable tones. Markers give bold, flat color quickly. Watercolors are perfect if you want realistic water and sky gradients. If you draw digitally, any standard drawing app (Procreate, Photoshop, Krita) works well too.
Optional extras: A ruler or French curve can help with straighter masts or smoother hull curves, especially for beginners still building confidence with freehand lines.
Understanding Boat Anatomy
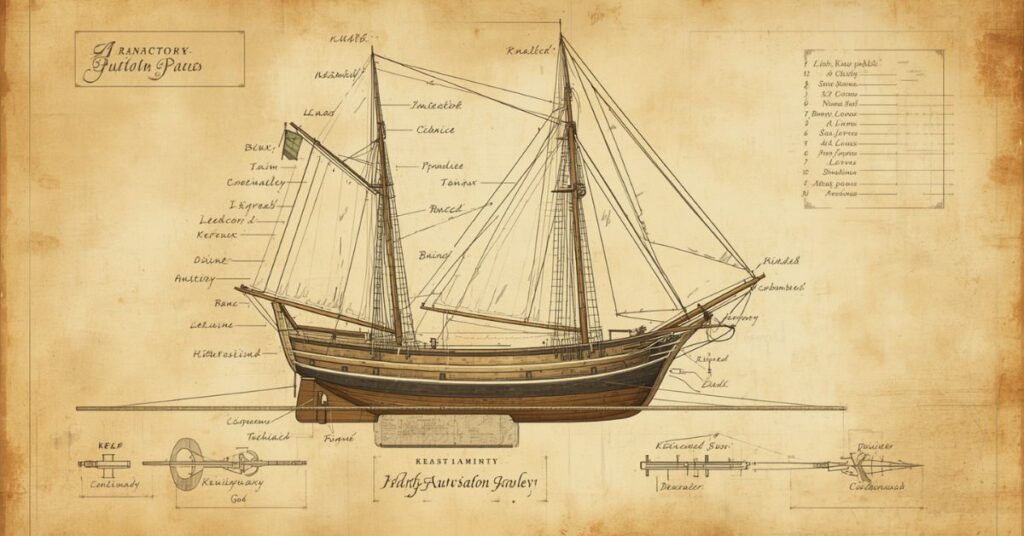
Before you can draw a convincing boat, it helps to understand what you’re actually looking at. Knowing the basic parts of a boat and their correct proportions relative to each other is what separates a stiff, awkward sketch from one that reads as believable at a glance.
Hull: This is the main body of the boat that sits in the water. The bow is the front (usually pointed or curved to cut through water), the stern is the back (typically flatter or squared off), and the keel is the boat’s underside spine, which you won’t see directly but which shapes the curve of the hull you draw.
Waterline: The horizontal line marking where the hull meets the water’s surface. Getting this placement right instantly makes a boat look like it’s floating rather than sitting awkwardly on the page.
Deck and superstructure: The deck is the flat top surface of the boat, while the superstructure includes any structures built above its cabins, cockpits, or control areas.
Mast, rigging, and sails: Found on sailboats, the mast is the vertical pole, rigging refers to the ropes and lines supporting it, and sails catch the wind to propel the boat forward.
Propulsion elements: Depending on the boat type, this could be oars (rowboats), a motor and propeller (motorboats), or sails (sailboats).
Understanding these parts means every line you draw has a purpose, not just a shape.
Basic Shapes & Construction
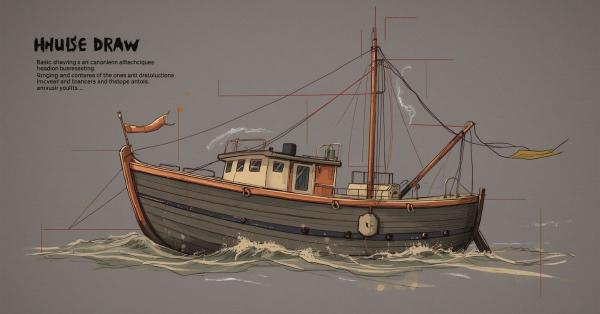
Every complex boat drawing starts with simple, forgiving shapes. Once you learn to break a boat down into basic forms, drawing any type of rowboat, sailboat, or yacht becomes far less intimidating.
The crescent shape: Most hulls can be built from a simple crescent or curved “U” shape, similar to a banana or a shallow bowl. Draw a gentle curve for the bottom of the hull, then a second curve above it for the top edge, wider than the base. This immediately gives you a recognizable boat silhouette to build on.
The bowl method: Think of the hull as an upside-down bowl cut off at an angle. This mental model helps you understand how the hull curves in three dimensions, not just as a flat side profile, which becomes especially useful once you start drawing boats at an angle rather than straight-on.
Establishing the waterline and tilt: Decide early whether your boat is sitting flat, tilting slightly (as if caught mid-wave), or angled toward the viewer. Sketch a light guideline for the waterline first, and let the hull curve settle naturally around it.
The center line technique: Draw a faint vertical line down the center of your boat before adding details. This keeps both sides symmetrical, which is especially important for the hull, cabin, and sails asymmetry here is one of the most common beginner mistakes.
Master these construction basics, and every boat type covered later becomes a variation on the same core idea.
Step-by-Step: Drawing a Simple Rowboat
The rowboat is the perfect starting point for beginners; it has no mast, sails, or complex superstructure, just a clean hull and a few simple details.
Step 1: Draw the hull. Using the crescent method from the previous section, sketch a curved “U” shape. Keep the bottom curve gentle and the top edges flared slightly outward on both sides.
Step 2: Add the top edge (gunwale). Draw a thin curved line just inside the top edge of the hull. This represents the rim of the boat and adds a sense of thickness to the hull walls.
Step 3: Sketch the bench seats. Add two or three short horizontal lines across the width of the boat one near the front, one in the middle, and one near the back. These represent the seats where rowers would sit.
Step 4: Draw the oars. Add two diagonal lines extending from the sides of the boat, one on each side, resting on small oar locks. Keep the angle consistent on both sides for balance.
Step 5: Check proportions. The boat should generally be wider than it is tall, with the bench seats evenly spaced. Compare both ends to make sure the bow and stern feel balanced.
Step 6: Refine and clean up. Erase any leftover guidelines, and darken the final outline of the hull, seats, and oars.
At this stage, your rowboat is complete and ready for water, shading, or color.
Step-by-Step: Drawing a Sailboat
A sailboat builds on the same hull fundamentals as the rowboat, with the added challenge of getting the mast, sails, and rigging to look balanced and believable.
Step 1: Draw the hull. Start with the same crescent shape used earlier, but make it slightly narrower and more streamlined than a rowboat hull, since sailboats are built for cutting through water efficiently.
Step 2: Add the deck line. Sketch a thin curved line along the top edge of the hull to suggest the deck surface.
Step 3: Position the mast. Draw a straight vertical line rising from roughly the center of the boat. As a general rule, the mast height should be about one to one-and-a-half times the length of the hull. Too short looks stubby, too tall looks unstable.
Step 4: Draw the mainsail. Sketch a large triangular shape extending from the mast toward the stern, with a gently curved leading edge to suggest wind filling the sail rather than a flat, stiff triangle.
Step 5: Add the jib. Draw a smaller triangular sail in front of the mast, angled toward the bow, to complete the classic two-sail silhouette.
Step 6: Add rigging lines. Draw a few thin lines connecting the mast to the deck and sail edges, representing the ropes that control the sails.
Step 7: Refine details. Add a small flag at the mast top, clean up guidelines, and darken your final outline.
Step-by-Step: Drawing a Motorboat/Yacht
Motorboats and yachts trade the sails and rigging of a sailboat for a sleeker, more streamlined hull and a defined cabin structure, giving them a very different visual character.
Step 1: Draw the streamlined hull. Start with a longer, lower crescent shape than you’d use for a rowboat or sailboat. The bow should taper to a sharper point, since motorboats are built for speed and need to cut cleanly through water.
Step 2: Add the deck and hull thickness. Sketch a curved line along the top edge of the hull, then add a second parallel line just below it to give the hull some visible thickness and depth.
Step 3: Build the cabin. Draw a rectangular or trapezoid shape roughly in the middle-to-front section of the deck. Round off the corners slightly for a more modern, aerodynamic look.
Step 4: Add the windshield. Sketch a slanted line or small curved panel at the front of the cabin to suggest glass. A slight backward tilt adds a sense of speed.
Step 5: Draw the engine details. At the stern, add a small rectangular or curved shape to represent the outboard motor, along with a propeller line just beneath the waterline if visible.
Step 6: Add the wake. Sketch a few curved lines trailing behind the stern to suggest motion and speed through the water.
Step 7: Refine and finalize. Clean up guidelines and darken your final outline, keeping edges crisp for that sleek motorboat look.
Perspective & Angles
Once you’re comfortable drawing a boat from a straightforward side view, learning to render it from different angles adds realism and variety to your work.
Side view (profile): This is the easiest and most common starting angle. The hull, mast, and cabin are all visible in a flat, easy-to-measure silhouette, which is why it’s the best place to begin as a beginner. Proportions are also simplest to judge from this angle.
Three-quarter view: This angle adds real depth and dimension, showing both the side and front of the boat at once. Start by drawing the hull’s centerline curving away from the viewer, then build the width of the boat asymmetrically the near side will appear larger than the far side. This is the most commonly used angle in illustration because it feels dynamic without being difficult to read.
Front/bow view: Drawing a boat head-on emphasizes the narrow, pointed shape of the bow and requires careful attention to symmetry, since any error is immediately obvious. The hull will appear much narrower and taller than in a side view.
Stern view: Similar to the bow view, but typically flatter and wider, especially on motorboats and yachts. This angle is useful for showing engine details or a boat sailing away from the viewer.
Boats at a distance vs. close-up: Distant boats can be simplified into basic silhouettes with minimal detail, while close-up boats demand accurate proportions, visible texture, and careful attention to light and shadow.
Water & Environment
A boat rarely exists in isolation; the water and surroundings around it play a huge role in making the drawing feel complete and believable.
Waves and ripples: Draw a series of curved, horizontal lines around the hull, varying their thickness and spacing. Lines closest to the boat should be more broken and irregular, since the hull disturbs the water directly around it, while lines farther away can be smoother and more evenly spaced.
Reflections on water: Beneath the boat, lightly sketch a mirrored, wavy version of the hull and any tall elements like the mast. Keep reflection lines looser and more distorted than the boat itself, since water rarely produces a perfectly clean mirror image.
Wake and motion lines: For boats in motion, add curved trailing lines behind the stern, fanning outward. The faster the boat, the longer and more pronounced these lines should be.
Weather elements: A calm sea calls for soft, gently curved horizontal lines, while a stormy sea needs sharper, more jagged wave shapes with foam details (small scribbled or dotted marks at wave crests) to suggest turbulence.
Background elements: Consider adding a distant shoreline, a simple dock, other boats, or a horizon line to give your scene context. Keep background elements simpler and lighter in tone than your main boat, so it remains the clear focal point.
Together, these environmental details transform a technical boat drawing into a complete, atmospheric scene.
Adding Details & Realism
Once your basic boat structure is in place, small details are what push a drawing from “recognizable” to genuinely convincing.
Portholes, railings, ropes, and anchors: Add small circles along the hull for portholes, spaced evenly for a clean, realistic look. A thin horizontal line with small vertical posts along the deck edge suggests a railing. Coiled or draped rope shapes near the bow, along with a simple anchor outline, add authentic nautical character.
Weathering and texture: Real boats aren’t perfectly smooth. Add subtle wood grain lines on wooden hulls using thin, slightly wavy strokes running lengthwise. For metal hulls, small scratches or streaks suggest rust and wear. Scattered small marks along painted surfaces can imply chipped paint, giving the boat a sense of history and use.
Flags, life rings, and accessories: A small flag at the stern or mast top adds movement and scale. A life ring, painted with alternating color bands, is a classic detail for both rowboats and larger vessels. These small touches make a boat feel lived-in rather than sterile.
Light and shadow: Decide on a consistent light source direction before shading. The side of the hull facing the light should stay lighter, while the opposite side receives darker shading. Cast a soft shadow beneath the boat onto the water to ground it visually. Consistent shading is often what makes the biggest difference between a flat sketch and a dimensional, realistic drawing.
Inking Techniques
Once your pencil sketch is finalized, inking locks in your linework and gives the drawing a clean, polished, finished look.
Line weight variation: Not all lines should be the same thickness. Use thicker, bolder lines for the outer silhouette of the boat, the hull edge, deck outline, and mast since these define the overall shape. Reserve thinner lines for interior details like planks, portholes, or rigging. This variation in weight naturally draws the eye to the boat’s main form first, then lets it wander into the finer details.
When and how to ink over pencil: Only ink once you’re fully satisfied with your pencil sketch, since inked lines are permanent. Work in sections, starting with the hull outline, then moving to the deck and superstructure, and finishing with small details like ropes and portholes. Let the ink dry completely before erasing pencil marks underneath, to avoid smudging.
Cross-hatching vs. stippling for texture: Cross-hatching, which layers intersecting parallel lines, works well for suggesting shadow on flat surfaces like the hull or cabin walls, with denser hatching indicating darker areas. Stippling, using small dots instead of lines, is better suited for softer textures like weathered wood, sand, or foggy backgrounds, since it creates a more gradual, grainy transition between light and shadow.
Both techniques take practice, so experiment on scrap paper before committing to your final piece.
Coloring & Rendering
Color brings your boat drawing to life, setting the mood and style of the entire piece from a cheerful summer scene to a moody, weathered vessel.
Color palettes for different boat types: A classic nautical look pairs red, white, and navy blue, evoking traditional sailing and coastal themes. For a rustic rowboat, warm wood tones like ochre, burnt sienna, and soft brown feel natural and weathered. Modern motorboats and yachts often suit cooler, sleeker palettes, whites, silvers, and deep blues paired with glossy highlights to suggest polished surfaces.
Water coloring techniques: Water rarely reads well as a single flat color. Build gradients by blending darker blues or greens near the bottom of your scene into lighter tones near the horizon. For reflections, use soft, slightly blurred versions of the boat’s colors directly beneath it, broken up with small horizontal streaks to mimic gentle ripples. Adding touches of white or pale yellow near the waterline can suggest sunlight catching the surface.
Digital coloring tips: If working digitally, use separate layers for the boat, water, and background so you can adjust each independently. Soft brushes work well for water gradients and reflections, while harder-edged brushes keep the boat’s outline crisp. Adjusting layer opacity is an easy way to build up shadow and depth gradually without committing too early.
Whichever medium you choose, keeping your color choices consistent with your chosen light source will tie the whole piece together.
Common Mistakes & Fixes
Even experienced artists run into recurring issues when drawing boats. Recognizing these common mistakes early makes them much easier to avoid or correct.
Asymmetrical hulls: One of the most frequent beginner errors is a hull that looks lopsided, with one side curving differently than the other. The fix is simple: always sketch a light center line down the middle of the boat before drawing the hull, and regularly flip your paper or check both sides against it to catch inconsistencies early.
Incorrect waterline placement: If the waterline is drawn too high or too low, the boat can look like it’s either sinking or floating unnaturally above the surface. Aim to place it so a reasonable portion of the hull sits below the line, keeping the boat visually grounded and balanced.
Flat-looking boats: A common issue is a boat that looks like a cardboard cutout rather than a three-dimensional object. This usually comes from skipping shading or perspective cues. Adding consistent shadow on one side, plus a curved deck line and reflection in the water, immediately adds volume and depth.
Overcrowded details: It’s tempting to add every possible detail, portholes, ropes, railings, and texture all at once, but this can clutter the drawing and hide the boat’s overall shape. Instead, prioritize a few key details that support the boat type and composition, and resist the urge to fill every inch of space.
Practice Exercises
Reading about technique only goes so far, regular, focused practice is what actually builds skill and confidence in drawing boats.
5-minute gesture sketches: Set a timer and quickly sketch boat silhouettes without worrying about detail or precision. Focus purely on capturing the overall shape and proportion of the hull, mast, and cabin in a few loose strokes. This builds speed and helps you internalize boat shapes so they eventually come naturally, without over-thinking each line.
Copying reference photos: Find a handful of real boat photographs and recreate them as closely as possible. This exercise trains your eye to notice subtle details like how light falls across a curved hull or how rigging lines actually connect that are easy to overlook when drawing from imagination alone.
Drawing the same boat from multiple angles: Pick a single boat design and draw it from the side, three-quarter, front, and stern views in one sitting. This is one of the most effective ways to deepen your understanding of a boat’s three-dimensional structure, since it forces you to think beyond a flat, single-angle representation.
Boat-a-day challenge: Commit to drawing one small boat sketch daily for a week or a month, varying the type, angle, or style each time. Consistency matters more than perfection here even rough five-minute sketches, repeated daily, build noticeably faster progress than occasional, longer sessions.
These exercises, done consistently, will improve your boat drawings faster than technique alone.
Inspiration & Reference Gathering
Even the most skilled artists rely on references and outside inspiration no one draws convincing boats purely from memory, especially when starting out.
Where to find good reference photos: Look for high-resolution photos of boats from multiple angles, ideally with clear lighting that shows shadow and form. Marinas, harbors, and coastal towns are great real-world sources if you have access to them, letting you observe boats directly and even sketch from life. Online image libraries and stock photo sites are useful alternatives when you can’t observe boats in person.
Studying real boats vs. illustrated styles: Real photographs teach you accurate proportions, structural details, and how light behaves on curved surfaces. Illustrated or stylized boat art, on the other hand, shows you how other artists simplify, exaggerate, or stylize those same real-world forms for different effects. Studying both gives you a fuller toolkit of technical accuracy from photos, and creative flexibility from illustration.
Following other artists’ boat drawings: Browsing sketchbooks, tutorials, and finished pieces from other artists whether traditional or digital can expose you to techniques and stylistic choices you might not discover on your own. Pay attention not just to the final result, but to how different artists handle recurring challenges, like rendering reflections or simplifying rigging.
Building a small personal reference library, saved and organized by boat type or angle, will make every future drawing session faster and more informed.
Conclusion
Drawing a boat is ultimately about breaking down something that looks complex into a series of simple, manageable steps. Every boat, whether it’s a humble rowboat, an elegant sailboat, or a sleek motor yacht, starts with the same basic building blocks: a curved hull, a clear waterline, and careful attention to proportion. From there, it’s just a matter of layering in detail masts and sails, cabins and railings, texture and shading until the drawing feels complete.
Throughout this guide, you’ve learned how to construct boats from basic shapes, understand their anatomy, render them from multiple angles, and bring them to life with water, light, and color. You’ve also seen the common mistakes that trip up many artists, along with practical fixes, and practice exercises designed to build real, lasting skill over time.
The most important thing to remember is that progress comes from repetition, not perfection. Your first boat drawing won’t look like your fiftieth, and that’s exactly how it should be. Each sketch teaches you something new about proportion, structure, or light that the last one didn’t.
So grab a pencil, pick a boat type that excites you, and start sketching. Whether you’re drawing a peaceful rowboat on a calm lake or a dramatic yacht cutting through choppy waves, the water is wide open for your creativity.
Happy sketching, and don’t forget to share your finished boats every artist started with a single wobbly hull.