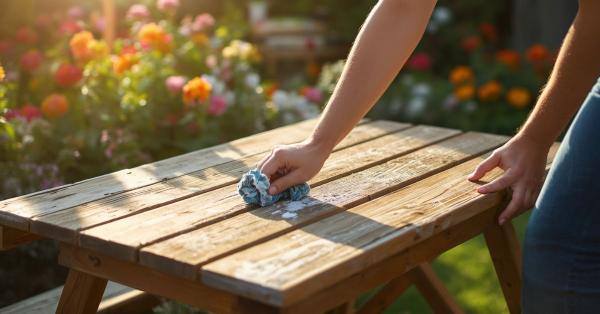
Outdoor furniture works hard. It sits through blazing sun, sudden downpours, wind-blown pollen, and months of daily use, all while trying to look as inviting as the day you bought it. Without regular care, that wear starts to show: wood grays and cracks, metal rusts, cushions grow musty, and plastic dulls under UV rays. The good news is that most of this damage is entirely preventable with a bit of routine maintenance.
Cleaning your patio set isn’t just about appearances, either. It protects your investment, extends the life of every piece, and keeps mold and mildew from becoming a health concern for anyone who uses the space. The catch is that not all outdoor furniture responds to the same cleaning method. What works beautifully on teak can actually damage wicker or strip a metal finish.
This guide walks through everything you need to know, material by material, problem by problem, so your outdoor furniture stays clean, protected, and ready for use all year round.
Understanding Your Furniture Material
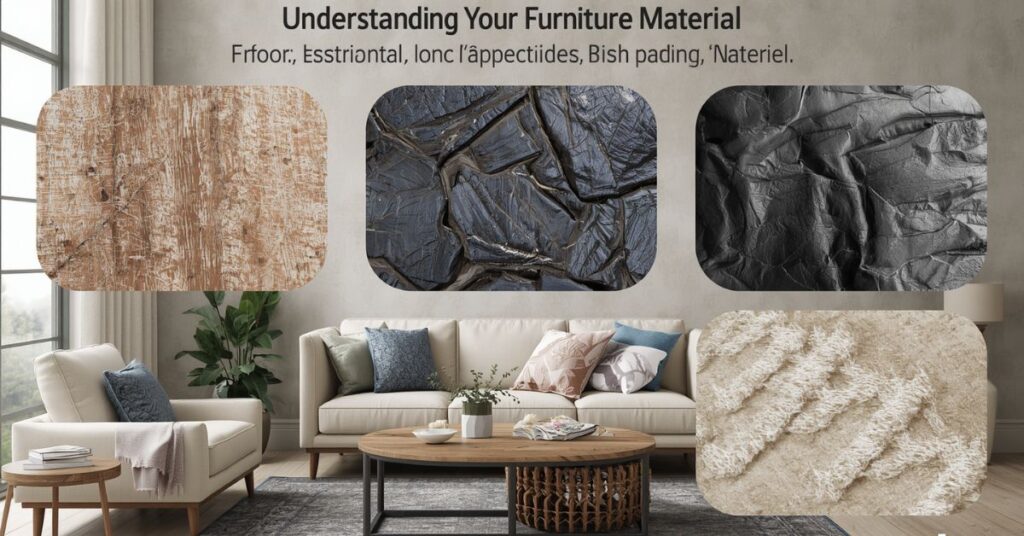
Before you reach for a sponge or spray bottle, it’s worth taking a minute to correctly identify what your furniture is actually made of. This single step prevents most cleaning mistakes, since a method that works wonders on one material can strip, scratch, or discolor another. Teak, for instance, can handle a vinegar solution without issue, but the same mixture might dull a powder-coated aluminum finish or weaken natural wicker fibers.
Start by checking for a care tag, manufacturer sticker, or original purchase receipt, which often lists the exact material and any recommended cleaning products. If that’s not available, look closely at the piece itself. Wood grain, weight, and warmth to the touch usually indicate real wood, while a uniform, lightweight feel points to resin or plastic. Metal furniture will feel cool and rigid, and a magnet can help distinguish steel or iron from aluminum, which isn’t magnetic.
It’s also important to notice any existing finishes or treatments, since these change how you should clean the piece. Sealed or oiled wood needs gentler care than raw wood. Powder-coated metal is more resistant to scratching than bare or painted metal. Fabric cushions may have a factory-applied water-repellent coating that harsh scrubbing can wear away over time.
Taking the time to properly identify your furniture’s material and finish sets the foundation for everything that follows, ensuring the cleaning methods in the sections ahead actually help your furniture rather than accidentally causing damage.
Essential Tools & Supplies

Having the right tools on hand before you start makes the entire cleaning process faster and helps you avoid reaching for something too harsh in a pinch. Most outdoor furniture cleaning can be done with a fairly small, affordable kit that you likely already have around the house.
For the basics, stock up on mild dish soap or a gentle all-purpose cleaner, a couple of soft-bristle brushes, microfiber cloths, a bucket, and a garden hose with a spray nozzle. An old toothbrush is surprisingly useful for scrubbing into tight seams, joints, and woven crevices where dirt tends to hide.
Certain materials call for specialized tools. A wire brush works well on rust spots on iron or steel but should never touch wood, wicker, or resin, since it will scratch or tear the surface. Soft natural-bristle brushes are gentler for wicker and rattan, while a plastic scraper can help lift stuck-on debris from resin furniture without leaving marks.
Beyond soap and water, natural ingredients like white vinegar and baking soda handle most stains and mildew without harsh chemicals. Keep a spray bottle on hand for applying vinegar solutions evenly. If you prefer commercial products, choose ones labeled specifically for outdoor furniture or the exact material you’re cleaning, and always check for compatibility first.
Finally, don’t forget basic safety gear. Gloves protect your hands during extended scrubbing sessions, and eye protection is worth using anytime you’re working with bleach or stronger commercial cleaners.
General Cleaning Principles

Regardless of what your furniture is made of, a few core principles apply across the board and will save you from accidental damage. Following these before diving into material-specific steps ensures a safer, more effective clean every time.
Always test any new cleaning solution on a small, hidden area first, such as the underside of a chair or the back corner of a cushion. Wait a few minutes to check for discoloration, streaking, or texture changes before applying it more broadly. This is especially important with vinegar, baking soda pastes, or any commercial cleaner you haven’t used before.
Stick to a consistent order of operations: clear away loose dust and debris first, wash with your chosen solution, rinse thoroughly to remove all residue, and then dry completely before covering or storing the piece. Skipping the rinse step is a common mistake that leaves soap film behind, which can attract more dirt over time.
Timing matters too. Cleaning in direct, high midday sun can cause solutions to dry too fast, leaving streaks or spots. Early morning or late afternoon, on a mild, dry day, is ideal.
Avoid a few common pitfalls: pressure washers can force water into wood joints or wicker weaves and strip protective finishes, so use them cautiously if at all. Harsh chemicals like undiluted bleach can degrade fabric fibers and dull metal finishes. And letting furniture air dry too quickly under direct sun can cause warping or fading, so moderate drying conditions are best whenever possible.
Material-by-Material Deep Dive
Wood (teak, cedar, pine): Scrub with mild soap and a soft brush, following the grain. For graying or mildew, use a diluted vinegar solution. Sand lightly if rough, then reapply oil or sealant once fully dry.
Metal (aluminum, wrought iron, steel): Wash with soapy water using a soft cloth. Remove rust with a wire brush, then touch up bare spots with rust-resistant paint. Dry immediately to prevent new corrosion.
Plastic & Resin: Soap and water handle most grime. For stubborn stains, use a baking soda paste and let it sit before scrubbing. A magic eraser lifts scuffs and UV-faded patches effectively.
Wicker & Rattan: Vacuum crevices first, then wipe with a barely damp cloth and mild soap. Avoid soaking, which weakens fibers. Air-dry in shade rather than direct sun to prevent brittleness.
Glass & Stone Tabletops: Clean glass with a vinegar-water solution and a lint-free cloth for a streak-free finish. Porous stone should be cleaned gently and resealed periodically to prevent staining.
Fabric & Cushions: Brush off debris, then spot-clean with mild soap. Oxygen bleach solutions handle deeper stains on outdoor-grade fabrics. Always air-dry fully, standing cushions on edge to prevent trapped moisture.
Umbrellas & Canopies: Clean fabric similarly to cushions, and wipe down metal frames separately. Check moving joints and hinges for rust or stiffness after washing.
Tackling Specific Problems
Even with regular cleaning, outdoor furniture runs into specific issues that need targeted solutions. Here’s how to handle the most common ones.
Mold and mildew thrive in damp, shaded areas. A solution of one part white vinegar to three parts water works for light cases; let it sit for 10–15 minutes before scrubbing. For deeper infestations, a diluted bleach solution (safe-tested first) may be necessary, followed by a thorough rinse.
Rust spots on iron or steel should be scrubbed with a wire brush to remove flaking material, then treated with a rust converter or touched up with rust-resistant paint to prevent it from spreading.
Bird droppings and tree sap should be removed promptly, since both can stain and even damage finishes if left too long. Warm soapy water usually lifts droppings, while a bit of rubbing alcohol on a cloth helps dissolve sap without harming most surfaces.
Hard water stains and mineral deposits, common on glass tabletops and metal fixtures near sprinklers, respond well to a vinegar-water spray left on for a few minutes before wiping clean.
Pollen buildup is best handled with a simple hose rinse followed by a soft brush; pollen tends to be dry and lifts easily before it has a chance to bind with moisture.
Grease and food stains on dining sets need a stronger degreasing dish soap, applied directly and scrubbed gently before rinsing.
Fading from sun damage can sometimes be softened using UV-protectant sprays formulated for outdoor materials, though severe fading is usually permanent.
Deep Cleaning vs. Routine Maintenance
Keeping outdoor furniture in good shape isn’t a single task but a rhythm of small, consistent actions paired with occasional deeper attention. Understanding the difference between routine upkeep and deep cleaning helps you spend just the right amount of time and effort without over- or under-maintaining your pieces.
Weekly or bi-weekly, a quick wipe-down is usually enough. Use a damp cloth to remove dust, pollen, and light grime from surfaces before it has a chance to build up. This takes just a few minutes per piece and prevents dirt from settling into finishes or fabric fibers.
Monthly, step up to a more thorough clean. This includes washing furniture with soap and water, scrubbing into seams and joints, and checking cushions for early signs of mold or staining. This is also a good time to inspect for loose hardware, rust spots, or fraying wicker before small issues become bigger problems.
Seasonally, plan for a full deep clean tied to opening and closing your outdoor space for the year. In spring, this means thoroughly washing every piece, reapplying sealants or protective oils, and checking fabric for winter damage. In fall, before storing furniture or covering it for colder months, give everything a final deep clean, ensure it’s completely dry, and apply any last protective treatments so pieces are ready to go untouched all winter.
This layered approach light routine care backed by periodic deeper attention keeps furniture looking its best while minimizing the time spent on any single
Protecting Furniture After Cleaning
Cleaning removes dirt and grime, but protection is what keeps furniture looking good and holding up over time.
Sealants, oils, and waterproofing sprays vary by material. Wood benefits from teak oil or a specialized outdoor wood sealant applied once or twice a season, which helps prevent graying and cracking. Metal furniture can be protected with a light coat of car wax on painted or powder-coated surfaces, adding a water-resistant barrier. Fabric cushions and umbrella canopies do well with a fabric-specific waterproofing spray reapplied after every deep clean, since factory coatings wear off with repeated washing and sun exposure.
Furniture covers are one of the simplest ways to extend time between cleanings. Choose breathable, water-resistant covers rather than fully waterproof ones, since trapped moisture underneath can encourage mold growth just as easily as rain exposure would
Off-season storage matters most for cushions and fabric elements, which are more vulnerable to moisture and pests than solid wood or metal frames. Store cushions in a dry, ventilated space such as a garage, shed, or dedicated storage box rather than leaving them outdoors through winter. If indoor storage isn’t available, at minimum keep them elevated off the ground and fully covered.
Eco-Friendly & Natural Cleaning Alternatives
For those who prefer to avoid harsh chemicals, especially in yards with kids, pets, or nearby garden beds, most outdoor furniture cleaning can be handled just as effectively with simple, natural ingredients already found in most kitchens.
White vinegar is one of the most versatile options. Diluted with water, it cuts through mildew, hard water spots, and light grime on wood, glass, and metal without the harsh fumes or residue of commercial cleaners. Its acidity also makes it naturally antibacterial, which helps on frequently touched surfaces like tabletops and armrests.
Baking soda works well as a gentle abrasive for tougher stains on plastic, resin, and even some metal finishes. Mixed into a paste with a little water, it lifts stuck-on dirt without scratching most surfaces, making it a safer alternative to steel wool or harsh scouring pads.
Castile soap, a plant-based liquid soap, makes an excellent all-purpose cleaner when diluted with water. It’s gentle enough for fabric cushions and wicker, yet effective enough to cut through everyday dirt and body oils from regular use.
Lemon juice offers a natural alternative to bleach for lightening mild mildew stains and adds a fresh scent, though it works best on lighter-colored materials since its acidity can sometimes affect darker dyes over time.
When cleaning near gardens, lawns, or pet areas, natural solutions reduce the risk of runoff harming plants or animals. They also tend to be gentler on furniture finishes overall, making them a solid go-to for regular maintenance rather than just occasional deep cleans.
When to Repair or Replace vs. Clean
Not every problem can be solved with soap, water, and elbow grease. Knowing when to stop cleaning and start repairing or replacing saves time and prevents you from pouring effort into furniture that’s past the point of restoration.
Structural rust is one of the clearest signs it’s time to move on from cleaning alone. Surface rust can usually be treated and painted over, but if rust has eaten through metal to the point of weakening joints or legs, no amount of scrubbing will restore structural integrity, and the piece may become unsafe to use.
Wood rot is similarly serious. Soft, crumbling, or spongy wood indicates the material has broken down internally, often due to prolonged moisture exposure. Surface cleaning and oiling won’t reverse this, and rotted sections typically need to be replaced or the entire piece retired.
Unraveling wicker or rattan can sometimes be repaired by reweaving loose strands or gluing broken pieces back into place, but widespread fraying across an entire piece usually signals it’s more cost-effective to replace than restore.
Cracked or brittle resin and plastic furniture, especially after years of UV exposure, often can’t be fixed through cleaning. Once material becomes chalky or starts cracking under light pressure, replacement is generally the better option.
When weighing repair against replacement, consider the cost of professional restoration or replacement parts against the price of new furniture, as well as how much sentimental or design value the piece holds for your space.
Frequently Asked Questions
Can I pressure wash outdoor furniture?
It depends on the material.
Pressure washing works reasonably well on solid metal or sealed wood at a low setting held a safe distance away, but it can force water into wood joints, strip protective finishes, and damage wicker weaves or fabric fibers. When in doubt, stick to a regular garden hose and manual scrubbing instead.
How often should I clean outdoor furniture?
A quick wipe-down every one to two weeks keeps dirt from building up, with a more thorough soap-and-water clean once a month.
Add a full deep clean at the start and end of each outdoor season to catch anything routine care might miss.
What’s the best way to remove mold from cushions?
Brush off loose debris first, then treat the area with an oxygen bleach solution or diluted vinegar, letting it sit for several minutes before scrubbing gently with a soft brush. Rinse thoroughly and dry completely in a well-ventilated, sunny spot, since trapped moisture is what allows mold to return.
Is bleach safe on outdoor fabric?
Undiluted bleach can weaken fibers and cause discoloration over time, especially on darker fabrics. If needed for tough mold or stains, always dilute it significantly and test on a hidden area first. Oxygen bleach is generally a gentler, safer alternative for most outdoor fabrics.
Can I use dish soap on all outdoor furniture?
Mild dish soap is safe for most materials, including wood, metal, plastic, and fabric, as long as it’s diluted and rinsed thoroughly afterward to avoid residue buildup.
Conclusion & Quick-Reference Checklist
Keeping outdoor furniture clean doesn’t require constant effort, just a consistent rhythm of small routine tasks paired with occasional deeper care. By identifying your furniture’s material upfront, using the right tools and techniques for each surface, and staying ahead of problems like mold, rust, and stains, you can keep your outdoor space looking inviting all year long while protecting your investment for years to come.
Use this quick checklist to stay on track:
Weekly/Bi-Weekly
- Wipe down surfaces with a damp cloth
- Brush off loose dust, pollen, and debris
Monthly
- Wash with mild soap and water
- Scrub seams, joints, and crevices
- Check for early rust, mold, or fraying
Seasonally (Spring & Fall)
- Deep clean every piece thoroughly
- Reapply sealants, oils, or waterproofing sprays
- Inspect for structural damage or wear
- Fully dry before covering or storing
As Needed
- Treat mold, rust, sap, or stains promptly
- Test any new cleaner on a hidden spot first
- Repair or replace pieces beyond restoring
With the right approach for each material and a little regular attention, your patio, deck, or backyard furniture can stay clean, protected, and ready for whatever the season brings.

John Updike was an American novelist, poet, and critic, famed for Rabbit series, suburban insight, elegant prose, literary awards, and lasting influence on modern fiction, cultural social psychological realism punsora.com