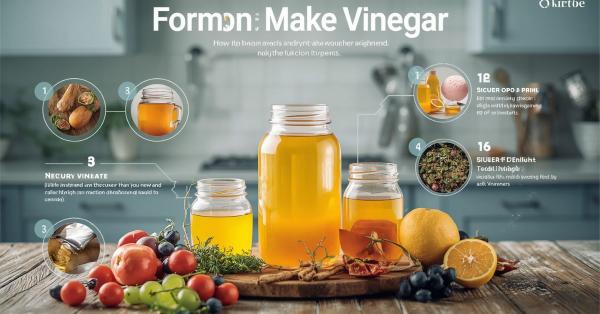
Vinegar is one of humanity’s oldest kitchen crafts, dating back thousands of years to civilizations that discovered likely by accident that wine or beer left open to the air would slowly turn sour and useful. That same transformation happens today in kitchens everywhere, powered by nothing more than time, airflow, and a colony of hardworking bacteria.
Making vinegar at home isn’t complicated, but it does reward patience. Unlike quick kitchen projects, this one unfolds over weeks, as sugars become alcohol and alcohol becomes acid. The payoff is a vinegar with far more character than anything off a supermarket shelf and the satisfaction of turning fruit scraps, leftover wine, or cheap cider into something genuinely useful.
In this guide, you’ll learn the science behind fermentation, the exact steps for several methods, how to troubleshoot common issues, and how to store and use your finished vinegar with confidence.
The Science of Vinegar
Making vinegar at home comes down to two distinct biological stages, both happening inside the same jar. Understanding them makes the whole process far less mysterious and helps you know exactly what’s going on when you check your jar each week.
Stage one: alcoholic fermentation. If you’re starting from something sugary, fruit scraps, juice, or sugar water wild or added yeast consumes those sugars and converts them into ethanol and carbon dioxide. This is the same basic process used to make wine or hard cider. You’ll notice a boozy smell developing after a week or two, a sign this stage is underway.
Stage two: acetic fermentation. Once alcohol is present, acetic acid bacteria (AAB) take over. These bacteria consume the alcohol and oxygen, converting it into acetic acid, the compound responsible for vinegar’s signature sourness and preservative power. This is why airflow matters so much during fermentation; AAB are aerobic and need oxygen to do their work.
Over time, the bacteria form a visible, gelatinous film on the liquid’s surface called “the mother.” This isn’t a byproduct, it’s the living bacterial colony itself, and it can be reused to jump-start future batches.
The final acidity of your vinegar depends on how much alcohol was available and how long fermentation continued, which is why taste-testing along the way matters more than following a fixed timeline.
Types of Vinegar You Can Make
The base liquid you start with determines both the flavor and the timeline of your finished vinegar, so it’s worth knowing your options before you begin.
Fruit scrap vinegar is the most beginner-friendly choice, using cores, peels, and trimmings from apples, pineapples, or grapes. It requires both fermentation stages, so it takes longer, typically 4–6 weeks total but it’s essentially free, since you’re using kitchen scraps that would otherwise be discarded.
Wine vinegar starts from red or white wine, which is already alcoholic, so you skip straight to acetic fermentation. This shortens the process to about 4–6 weeks and produces a vinegar with a rich, complex flavor close to what you’d find in gourmet bottles.
Cider vinegar uses hard apple cider as its base and follows a similar timeline to wine vinegar, producing the tangy, fruity flavor familiar from store-bought apple cider vinegar.
Beer or malt vinegar starts from beer and yields a milder, slightly grainy vinegar, popular in British and Commonwealth cooking traditions.
Rice vinegar is made from fermented rice wine and produces a lighter, subtly sweet vinegar common in East Asian cuisine.
Honey vinegar begins with a mead-like honey-water mixture, resulting in a delicate, floral vinegar that’s less common but distinctive.
Each type shares the same underlying science, but base ingredient availability, desired flavor, and how much time you want to invest should guide which one you try first.
Equipment & Ingredients
You don’t need specialized brewing gear to make vinegar, but a few basic choices matter for a clean, successful batch.
Containers: Use wide-mouthed glass jars or ceramic crocks. Avoid metal, since acetic acid can corrode it and pick up a metallic taste, and avoid plastic, which can scratch easily and harbor bacteria that compete with your culture.
Covers: A breathable cover is essential cheesecloth, a coffee filter, or a paper towel secured with a rubber band works well. This lets oxygen in (which acetic acid bacteria need) while keeping out fruit flies and dust. Never use an airtight lid, which can trap gas and prevent the aerobic stage from progressing.
Starter culture: You have three options: buy a bottled “mother of vinegar,” add a splash of raw, unfiltered vinegar that still contains live culture, or rely on wild yeast and bacteria naturally present on fruit skins and in the air. Store-bought starters are the most reliable for beginners.
Optional tools: pH strips or a hydrometer can help you track acidity and alcohol content more precisely, though they’re not required taste-testing works fine for home use.
Ingredients: Choose organic, unwaxed fruit when possible, since wax coatings can inhibit natural fermentation. If using wine or cider as a base, unpasteurized versions ferment more reliably, since pasteurization kills off the beneficial bacteria you’re relying on.
With these basics gathered, you’re ready to start your first batch.
Step-by-Step: Fruit Scrap Method
This is the most accessible way to start, since it uses food scraps you’d normally throw away.
1. Fill your jar. Pack a clean glass jar about ¾ full with fruit scraps, apple cores and peels work especially well, though pineapple rinds and grape skins are also popular choices.
2. Add sugar water. Dissolve 1 tablespoon of sugar into 1 cup of water and pour enough over the scraps to fully submerge them. If pieces float, weigh them down with a clean, non-metal object.
3. Cover and store. Secure cheesecloth over the jar with a rubber band and place it in a dark, warm spot, ideally 60–80°F (15–27°C).
4. Stir daily. For the first week, stir once a day to discourage mold and distribute yeast activity evenly.
5. Watch for stage one. After 1–2 weeks, the mixture should smell distinctly alcoholic, a sign that sugars have converted to alcohol.
6. Strain. Remove and discard the solid fruit scraps, keeping only the liquid.
7. Let it sit again. Return the liquid to the jar, re-cover, and let it ferment undisturbed for another 3–4 weeks. A filmy “mother” will start forming on the surface.
8. Taste-test weekly. Use a clean spoon each time to check progress without contaminating the batch.
Once the liquid tastes pleasantly sour rather than sweet or alcoholic, it’s ready to strain and bottle.
Step-by-Step: Wine/Cider Method
If you’re starting from an already-alcoholic liquid like wine or hard cider, you skip the alcoholic fermentation stage entirely and move straight to acetic fermentation cutting your overall timeline roughly in half compared to the fruit scrap method.
1. Choose your base. Pour red wine, white wine, or hard cider into a clean glass jar, filling it no more than ¾ full to leave room for airflow and activity.
2. Add a starter. Stir in a splash of raw, unfiltered vinegar, one that still contains visible strands or sediment of live mother culture. This inoculates your batch with the acetic acid bacteria it needs.
3. Cover properly. Secure cheesecloth or a coffee filter over the jar’s mouth with a rubber band, ensuring airflow while keeping out contaminants.
4. Find the right spot. Store the jar in a dark, warm location, away from direct sunlight and temperature swings.
5. Wait and watch. Over 4–6 weeks, a mother culture will gradually form on the surface, and the liquid will start smelling sharper and more vinegar-like.
6. Taste periodically. Check every week or so with a clean spoon, tracking how the flavor shifts from wine-like to tart.
7. Strain and bottle. Once it reaches the sourness you want, strain out the mother, save it to jump-start your next batch and transfer the vinegar to a clean bottle.
Step-by-Step: Other Methods
Beyond fruit scraps and wine, a few other bases are worth exploring once you’re comfortable with the basic process.
Rice vinegar. Start with fermented rice wine (sake or a homemade rice wine base) rather than raw rice, since the alcoholic fermentation step for rice is more technical and benefits from a dedicated rice wine starter. Once you have rice wine, treat it like the wine method: add a splash of raw unfiltered vinegar as a starter, cover with cheesecloth, and ferment in a warm, dark spot for 4–6 weeks. The result is a light, subtly sweet vinegar suited to dressings and dipping sauces.
Malt or beer vinegar. Pour flat beer into a jar, filling it ¾ full, and add a starter culture of raw vinegar. Cover and store as usual. Because beer has lower alcohol content than wine, fermentation can take slightly longer, often 5–7 weeks and produces a milder, grainier vinegar popular in British cooking.
Continuous “mother jar” method. Once you have an established mother, you can keep a larger jar going indefinitely. Simply add fresh wine, cider, or diluted alcohol whenever you remove finished vinegar, always leaving some liquid and the mother behind to keep the culture active. This turns vinegar-making into an ongoing kitchen habit rather than a one-off batch.
Each of these methods follows the same core science alcohol plus oxygen plus acetic acid bacteria just with different starting ingredients and slightly different timelines.
Environmental Factors That Affect Fermentation
The conditions surrounding your jar have as much influence on your vinegar’s success as the ingredients themselves, since you’re essentially managing a living ecosystem of yeast and bacteria.
Temperature. Fermentation works best between 60–80°F (15–27°C). Below this range, yeast and bacterial activity slows dramatically or stalls altogether; above it, the process can move too fast and produce off-flavors, or create conditions favorable to unwanted mold. A consistent room-temperature spot, like a kitchen cabinet or pantry shelf, usually works well.
Light exposure. Direct sunlight can raise the liquid’s temperature unpredictably and may degrade the delicate bacterial culture over time. Always store your jar in a dark or dimly lit space, a cupboard, closet, or covered corner of a counter.
Airflow and oxygen. Acetic acid bacteria are aerobic, meaning they need oxygen to convert alcohol into acetic acid. This is why an airtight lid will stall your batch, while a breathable cover made of cheesecloth or a coffee filter allows the process to continue while still blocking dust and insects.
Seasonal adjustments. Fermentation naturally speeds up in warmer months and slows in winter. If you’re brewing during colder weather, consider moving your jar closer to a consistently warm spot in the house, such as near (but not directly on top of) a running appliance, and expect the process to take a week or two longer than it would in summer.
Monitoring & Testing
Since vinegar-making doesn’t run on a fixed timer, regularly checking your batch is the best way to know when it’s progressing well and when something needs attention.
Taste-testing. This is the simplest and most reliable method for home use. Dip a clean spoon into the liquid once a week, tasting for the shift from sweet or alcoholic to increasingly sour. Always use a fresh, clean spoon each time to avoid introducing contaminants into the batch.
Using pH strips. For more precision, pH strips can track acidity as fermentation progresses. Finished vinegar typically falls between pH 2 and 3. While not necessary for casual home batches, this can be useful if you want consistent results across multiple attempts.
Using a hydrometer. A hydrometer measures the liquid’s specific gravity, which can help more advanced makers track how much sugar has converted to alcohol during the first fermentation stage, and later how alcohol is converting to acid.
Signs of normal progress. A gradually forming, translucent, rubbery film on the surface (the mother) is expected and healthy. A slowly intensifying sour smell replacing the initial alcoholic one is another good sign.
Signs of a healthy vs. unhealthy mother. A healthy mother is smooth, slightly slimy, and off-white to amber in color. If you see fuzzy patches, unusual colors like green, black, or pink, or a strong unpleasant odor, this indicates contamination rather than normal mother development, and the batch should be discarded.
Troubleshooting Guide
Even simple fermentation projects can run into hiccups. Here’s how to diagnose the most common issues.
Mold vs. mother. This is the most common point of confusion for beginners. The mother is smooth, translucent to amber-colored, and slightly rubbery or gelatinous; it sits on or just below the surface. Mold, by contrast, is fuzzy, raised, and often appears in unnatural colors like green, black, blue, or pink. If you see true mold, discard the batch entirely rather than trying to scoop it out, since mold can send roots into the liquid below.
No activity or stalled fermentation. If nothing seems to be happening after 2–3 weeks, the environment is likely too cool, or there wasn’t enough natural yeast or bacteria to kick things off. Try relocating the jar somewhere warmer, or add a fresh splash of raw, unfiltered vinegar to reintroduce active culture.
Vinegar is too weak or too harsh. Acidity builds gradually over time, so a weak-tasting batch usually just needs more time. If it’s too harsh or sharp, you let it ferment longer than needed next time, taste-test more frequently and bottle earlier.
Off smells. A faint alcoholic or yeasty smell is normal early on. However, a smell resembling nail polish remover, rot, or sulfur suggests contamination or an imbalance, and the batch is best discarded.
Fruit flies and contamination. Always use a tightly secured breathable cover, and avoid leaving the jar uncovered even briefly, since fruit flies are drawn quickly to fermenting liquid.
Straining, Bottling & Storage
Once your vinegar has reached the flavor and acidity you’re happy with, a few final steps ensure it stays fresh and usable for the long term.
Knowing when it’s done. There’s no fixed timeline relying on your taste tests. When the liquid tastes pleasantly sour with no trace of sweetness or alcohol, and the smell has fully shifted to sharp and vinegary, it’s ready.
Straining. Line a fine-mesh strainer or funnel with cheesecloth and pour the vinegar through it to remove the mother and any sediment. If you want to keep the mother for future batches, set it aside in a small amount of the strained vinegar to keep it alive and hydrated until your next batch.
Bottling. Transfer the strained vinegar into clean glass bottles with tight-fitting lids. Swing-top bottles or repurposed glass vinegar bottles both work well. Label each bottle with the vinegar type and the date it was bottled.
Storage conditions. Vinegar can be stored at room temperature, away from direct sunlight, or in the refrigerator if you prefer it chilled. Its high acidity makes it naturally shelf-stable and resistant to spoilage.
Shelf life. Properly made and stored vinegar keeps indefinitely. Over time, sediment may settle at the bottom or a new mother may form in the bottle. Both are harmless and simply a sign the culture is still alive. Simply strain again before use if this happens.
Using Your Homemade Vinegar
With a finished batch in hand, there’s no shortage of ways to put your homemade vinegar to work in the kitchen and around the house.
Culinary uses. Vinegar is a staple in vinaigrettes and salad dressings, where its acidity balances oils and sweeteners. It’s also essential for quick pickling cucumbers, onions, and other vegetables that can be ready in a matter of hours when submerged in a vinegar brine. Use it to deglaze pans after searing meat, brighten soups and stews with a splash added at the end, or tenderize meat in marinades, where the acid helps break down proteins.
Household uses. Vinegar’s acidity makes it a useful natural cleaner for countertops, glass, and other surfaces, and it can help cut through mineral buildup on faucets and showerheads. Many people also use it as a natural deodorizer, since it neutralizes odors rather than masking them. A small bowl left in a room or fridge can help absorb unwanted smells.
Flavor infusions. Homemade vinegar is a great base for infusions. Adding fresh herbs like tarragon or rosemary, whole spices like peppercorns or chili flakes, or fruit like berries or citrus peel lets you create custom flavored vinegars. Simply add your chosen ingredient to a bottle of finished vinegar and let it steep for 1–2 weeks, then strain out the solids before using.
Safety Notes
While homemade vinegar is generally safe and low-risk to make, a few important caveats are worth understanding before you rely on it for certain uses.
Not calibrated for canning. Homemade vinegar’s acidity can vary noticeably from batch to batch, typically ranging anywhere from 4% to 8% or more, depending on your ingredients and fermentation time. This inconsistency makes it unsuitable for canning or any process requiring a guaranteed, verified acidity level to ensure shelf stability and prevent bacterial growth, including botulism.
When to use tested recipes instead. For shelf-stable canning and preserving such as canned pickles, salsas, or other low-acid foods meant to sit at room temperature for months always use commercially produced vinegar with a labeled, verified 5% acidity. Reserve your homemade batches for quick refrigerator pickles, dressings, marinades, and other uses where long-term shelf stability isn’t a concern.
Storage safety. Because of its high acidity, properly made vinegar is naturally resistant to harmful bacterial growth and doesn’t require refrigeration, though chilling it won’t cause any harm. If a batch ever develops a foul, rotten odor, unusual colors beyond a normal mother culture, or visible mold, discard it rather than risk using it.
When in doubt, don’t use it. If you’re ever uncertain whether a batch fermented correctly due to unusual smells, colors, or textures it’s safest to discard it and start fresh rather than risk consuming something contaminated.
Conclusion
Making vinegar at home is a simple reminder that some of the best kitchen projects require very little from you beyond patience. With just a jar, a breathable cover, and the right conditions, you can turn fruit scraps, leftover wine, or flat cider into something genuinely useful and far more flavorful than what typically comes off a supermarket shelf.
The process rewards attentiveness more than effort. A weekly taste test, a warm dark spot, and a willingness to let time do the work are really all it takes to go from sugary liquid to a finished, tangy vinegar with real character. And once you’ve made one batch successfully, you’ll have a mother culture ready to make the next one even easier.
Don’t be afraid to experiment. Try different fruits, wines, or ciders as your base, play with infusions once your vinegar is finished, and pay attention to how flavor changes with fermentation time. Vinegar-making is forgiving enough that small variations rarely ruin a batch, which makes it an ideal project for curious home cooks.
Whether you’re using it for salad dressings, quick pickles, or as a natural household cleaner, homemade vinegar is a small, rewarding way to reduce waste and add something distinctive to your kitchen.
If you try this recipe, share how your batch turns out, what base you used, how long it took, and what you ended up making with it.