There’s a particular kind of dread that comes with a lifting corner of acrylic and no salon appointment in sight. Maybe your set has grown out, maybe you’re switching to a new style, or maybe you just don’t want to pay another $25 removal fee for something that’s technically just… dissolving plastic. Whatever the reason, taking off acrylic nails at home is completely possible but it’s also the step where most nail damage actually happens, not the application.
The difference between healthy nails underneath and thin, peeling ones usually comes down to one thing: patience. Rushing the soak, prying at stubborn products, or skipping the aftercare routine can undo months of nail growth in a single sitting.
This guide walks through exactly how to remove acrylics safely at home, the tools you actually need, what to avoid, and how to help your natural nails bounce back afterward.
Understanding Acrylic Nails
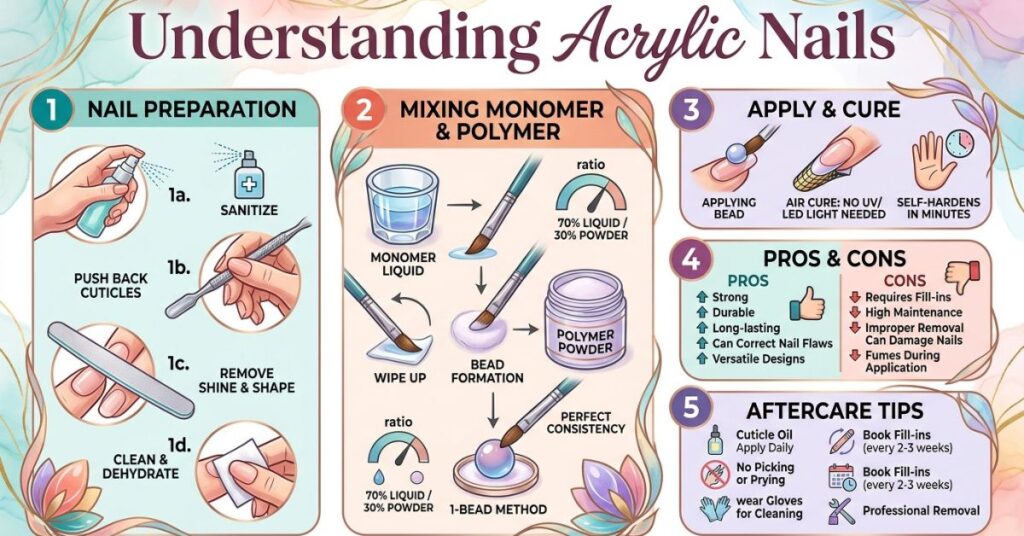
Before diving into removal, it helps to know what you’re actually taking off. Acrylic nails are created by combining a liquid monomer with a powder polymer, which react together to form a hard, durable coating over the natural nail or a nail tip extension. As this mixture cures, it hardens into a dense, plastic-like shell which is exactly why acrylics are so long-lasting, and also why they’re notoriously harder to remove than gel polish or dip powder.
Unlike gel, which is cured under UV or LED light and tends to peel off in fairly large pieces once softened, acrylic is chemically bonded and needs to be fully broken down before it will release from the nail. This is where acetone comes in: it doesn’t “melt” the acrylic so much as dissolve the polymer structure until it becomes soft and crumbly enough to gently scrape away.
A lot of confusion around acrylic removal comes from a few persistent myths. Another is that acetone itself “ruins” nails; used correctly, on skin-protected fingers, for a limited soak time, it’s actually the safest removal method available, far gentler than prying or filing acrylic off dry.
Understanding this bond is the key to understanding why the soak is the whole method, not a shortcut you can skip.
Why Proper Removal Matters
It’s tempting to treat acrylic removal as a five-minute afterthought, but this stage is where most long-term nail damage actually happens not during wear, and not during application. When acrylic is peeled, pried, or filed off dry instead of properly soaked, it takes layers of the natural nail plate with it. Nails become thin, flaky, and prone to peeling in sheets for weeks afterward, since the nail plate is made of stacked layers that don’t grow back overnight.
Beyond thinness, improper removal can leave the nail bed sensitive, weakened, or even slightly separated from the skin underneath, which increases the risk of infection if bacteria or fungus get into the gaps. Nails that have been repeatedly damaged this way often become brittle, ridged, or oddly textured over time, making future manicures harder to maintain and look smooth.
If you’ve had a rough removal before, you probably already recognize the signs: nails that feel unusually thin or bendy, visible white patches or ridges, peeling in horizontal layers, or tenderness around the nail bed. These are all signals that the nail plate was pulled apart faster than it was chemically softened.
The good news is that this damage is almost entirely avoidable. A slow, acetone-based soak that fully breaks down the product before any scraping happens puts far less mechanical stress on the nail than any “quick” method. Proper removal isn’t just about protecting your manicure budget, it’s about protecting the nail underneath for the long run.
Supplies Checklist
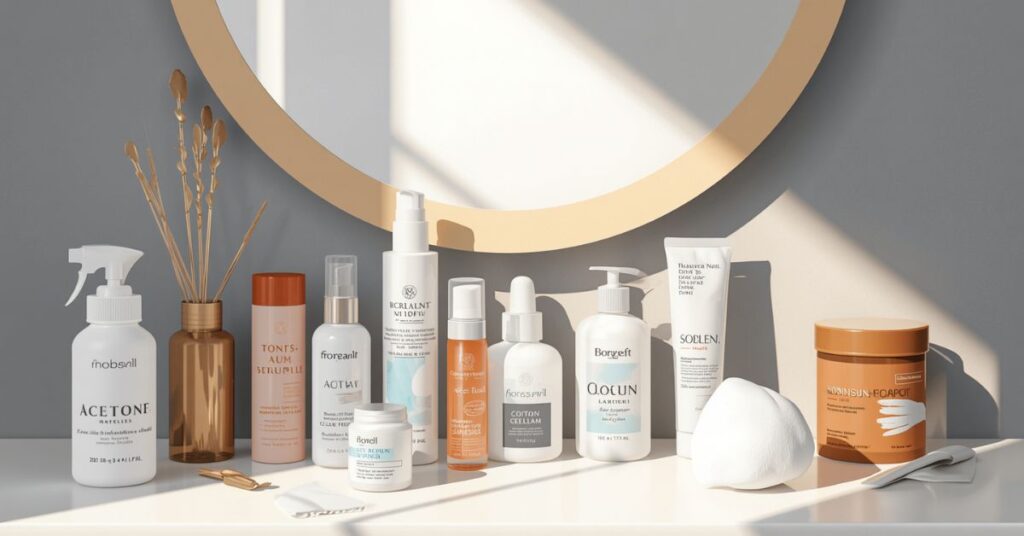
Having everything ready before you start makes the process smoother and keeps you from breaking a soak partway through to go hunting for a missing tool. Here’s what you’ll need.
Pure (100%) acetone is non-negotiable; this is different from the acetone-free polish removers sold for everyday use, which won’t break down acrylic no matter how long you soak. Look for it labeled “100% acetone” at beauty supply stores or pharmacies.
A glass or metal bowl is safer than plastic, since concentrated acetone can degrade or warp certain plastics over repeated use.
Cotton balls or pads, enough for all ten nails, to hold the acetone directly against the product.
Aluminum foil, cut into roughly 3-inch squares ahead of time, to wrap around each fingertip and trap heat, which speeds up softening.
A cuticle pusher or orangewood stick for gently scraping away softened acrylic metal tools with sharp edges should be avoided near the nail bed.
A coarse nail file or buffer block to break the sealed top coat before soaking.
Cuticle oil, hand cream, or petroleum jelly for both pre-soak skin protection and post-removal rehydration.
Optional extras include an electric nail file for pre-thinning thick sets (used carefully) and a small bowl warmer if you’re doing this in a cold room, since warm acetone works faster than cold. None of these require a big investment, most of this kit can be picked up in one trip for well under $20.
Pre-Removal Prep
A little preparation before you start soaking makes a real difference in how quickly and cleanly the acrylic comes off. Skipping this step is one of the main reasons people end up soaking for far longer than necessary.
Break the seal coat first. Acrylic sets have a hard, glossy top layer that acts almost like a barrier against acetone. Using a coarse nail file or buffer, gently buff across the surface of each nail until the shine disappears and the finish looks matte and dull. You don’t need to file deep or thin the nail down just enough to let acetone soak in rather than sit on top.
Protect the surrounding skin. Acetone is very drying and can irritate skin with extended contact, especially around the cuticles. Before wrapping anything, apply a thin layer of petroleum jelly or a thick cuticle oil around each nail, avoiding the nail plate itself.
Set up in a ventilated space. Acetone fumes can be strong in an enclosed room. Work near an open window or with a fan running, and avoid doing this soak right next to an open flame or heat source.
Trim length if needed. If your acrylics are long, trimming them down slightly beforehand can shorten soak time and make the eventual scraping step easier to manage.
Taking five extra minutes here isn’t wasted time; it directly cuts down how long you’ll need to sit wrapped in foil later, and it protects your skin from unnecessary dryness or irritation.
Step-by-Step Soak-Off Method (Foil Method)
This is the core technique, and the one most nail techs actually use in-salon. It’s slow, but it’s the gentlest way to fully release acrylic from the nail.
Step 1: Soak your cotton. Saturate a cotton ball or pad with pure acetone for each nail; it should be wet enough to stay damp for the full soak, not just lightly dabbed.
Step 2: Place and wrap. Press the soaked cotton directly onto the nail, then wrap a small square of foil snugly around the fingertip to hold it in place. The foil does double duty: it keeps the cotton pressed against the nail and traps warmth, which speeds up how fast the acetone breaks the acrylic down. Repeat across all ten fingers.
Step 3: Wait. Let your nails sit wrapped for 15–20 minutes for a standard set, or closer to 25–30 minutes for thicker, multi-layered, or older acrylic. Resist checking every few minutes unwrapping too early just lets the nail cool and slows progress.
Step 4: Test and remove. Unwrap one finger at a time, starting with whichever nail feels most ready. Using a cuticle pusher or orangewood stick, gently push at the softened product it should slide off with light pressure. If it resists or feels rubbery instead of mushy, don’t force it.
Step 5: Re-wrap if needed. For any stubborn spots, re-soak a fresh cotton pad and re-wrap that nail for another 10 minutes rather than picking or scraping harder.
Alternative Removal Methods
The foil method is the most popular approach, but it isn’t the only option.
A few variations work better depending on your skin sensitivity, the thickness of your set, or what tools you have on hand.
Direct bowl soak. Instead of wrapping each nail individually, you can dunk all ten fingertips directly into a glass or metal bowl of pure acetone for 15–20 minutes.
This is faster to set up than foil-wrapping but uses more acetone overall and skips the heat-trapping benefit foil provides, so soak times often run slightly longer.
Acetone and warm water bath.
For those with sensitive or easily irritated skin, some people place a small dish of acetone inside a slightly larger bowl of warm water, creating a gentler, indirect vapor-assisted soak. It’s slower than pure acetone contact but reduces direct skin exposure.
Electric file pre-thinning. Using a low-speed e-file to thin down the bulk of the acrylic before soaking can cut total soak time significantly.
Combination approach.
For very thick sets or acrylic applied over multiple fills, pairing filing with a shorter soak (rather than relying on soaking alone) often gives the best balance of speed and safety.
In general, foil wrapping remains the safest default: it uses less acetone, protects surrounding skin better, and gives more even, controlled softening than a full bowl soak.
What NOT to Do
Knowing what to avoid is just as important as knowing the right steps. Most acrylic removal damage comes from a handful of repeated mistakes.
Don’t peel or pry off hardened acrylic. This is the single biggest cause of nail damage.
Even if a corner is lifting and looks like it wants to come off, pulling it pulls layers of your natural nail along with it.
Don’t use metal tools to force the product off. Cuticle pushers and orangewood sticks should glide against softened acrylic, not dig or scrape against resistant products. If you’re pushing hard, the acrylic isn’t ready yet.
Don’t skip the filing step. Soaking straight through a glossy sealed top coat wastes time and acetone, since the barrier slows penetration significantly.
Don’t substitute non-acetone remover.
Regular polish remover isn’t strong enough to break down the polymer structure in acrylic, no matter how long you soak you’ll just end up with irritated skin and no results.
Don’t ignore burning or excessive irritation.
Mild dryness is normal; sharp burning, redness, or discomfort means you should rinse off and reassess, possibly switching to the warm-water bath method.
Don’t over-soak “just to be safe.” Extended, unnecessary contact with acetone dries out skin and nails more than needed once the product has already been released.
Don’t over-buff afterward. Aggressively filing the natural nail post-removal to smooth it out can thin it further right when it’s most vulnerable.
Post-Removal Nail Care & Recovery
Once the acrylic is off, your natural nails need a little attention to bounce back acetone soaking, even done correctly, strips moisture from both the nail plate and surrounding skin.
Buff gently, not aggressively. Lightly smooth any ridges or residue left behind with a fine-grit buffer, using minimal pressure. The goal is an even surface, not thinning the nail further.
Rehydrate immediately. Apply cuticle oil or a nail-specific serum right after removal, followed by a rich hand cream to lock in moisture. Massaging oil into the nail bed also helps stimulate circulation, which can support healthier regrowth.
Keep up a daily routine. For at least the first week after removal, apply cuticle oil once or twice daily. Nails that were under acrylic for weeks or months are often more porous and dehydrated than usual, so consistency matters more than any single application.
Consider a strengthening base coat. If you’re going polish-free for a while, a ridge-filling or strengthening base coat can protect nails as they recover, especially if they feel unusually thin or flexible.
Support growth from the inside, too. Staying hydrated and maintaining a balanced diet supports healthy keratin production, and some people find biotin supplements helpful though results vary and aren’t guaranteed.
Give it time. Full nail regrowth takes three to six months, since that’s roughly how long it takes for a nail to grow from cuticle to tip. Recovery from a single soak-off is usually much faster, often just one to two weeks of visible improvement.
Special Considerations
Not every removal situation is the same, a few scenarios call for extra care or a slightly adjusted approach.
Sensitive skin or acetone sensitivity. If your skin tends to react to acetone with redness, cracking, or discomfort, the warm-water bath method is a gentler alternative to direct soaking. Applying a thicker barrier of petroleum jelly beforehand and shortening individual soak intervals can also help.
Nail damage during removal. If a piece of natural nail lifts or breaks off alongside the acrylic, stop immediately rather than continuing to pick at the area. Trim any snagging edges carefully, apply cuticle oil, and give the nail extra time to recover before considering another set.
Very thin or brittle natural nails. If your nails were already fragile before the acrylic went on, extend soak times slightly rather than compensating with more scraping pressure thin nails should never be forced.
First-time removal or removal of teens. Go slower than the guide suggests, checking softness more frequently, since unfamiliarity with how “ready” acrylic should feel often leads to premature scraping.
Acrylic over gel or with nail wraps. These layered combinations can take noticeably longer to soak through, since the gel layer underneath resists acetone differently than acrylic alone. Extra patience and possibly an additional soak round is normal here.
In any of these cases, the underlying principle stays the same: when in doubt, soak longer rather than push harder. Time is the safest tool you have.
DIY vs. Professional Removal
For most people, with a standard set and healthy natural nails, DIY removal using the foil-and-acetone method is perfectly safe and can save both time and money. If you’re comfortable following each step patiently and have the right supplies on hand, there’s no strict requirement to visit a salon just to take a set off.
That said, a few warning signs suggest it’s worth booking a professional removal instead. If your nails already feel unusually thin, sore, or damaged from a previous bad removal, a nail tech can assess and remove the product with more precision than a first attempt at home. Similarly, if acrylic hasn’t budged after two full soaking rounds, forcing it further at home risks more harm than good. A salon has stronger tools and more experience judging when a product is truly ready to release.
Cost-wise, professional soak-off removal typically runs somewhere between $10 and $25 depending on location, often less if it’s paired with a new set. It usually takes about 20–30 minutes in-salon, similar to the DIY timeline, but with a trained eye monitoring the process.
If you’re unsure about your nails’ current condition, it’s reasonable to ask a nail tech directly: whether your nail bed looks healthy, whether repeated acrylic wear has caused thinning, and whether they’d recommend a break before your next set. A quick professional opinion can save you from repeating avoidable damage, even if you plan to handle removal yourself going forward.
Frequently Asked Questions
Does soaking off acrylics hurt your natural nails?
Done correctly, full soak, gentle scraping, no forcing soaking is the gentlest removal method available. Damage typically comes from rushing the process or prying at a product that hasn’t fully softened, not from the acetone soak itself.
How long does the soak-off process take?
Most standard sets take 15–20 minutes of wrapped soaking. Thicker, older, or multi-layered acrylic can take 25–30 minutes or longer, sometimes requiring a second shorter soak for stubborn spots.
Can I reuse acetone from a previous soak?
It’s best to use fresh acetone each time. Acetone evaporates and weakens with air exposure, and reused acetone often contains dissolved product residue that reduces its effectiveness.
What if my nails still have residue after soaking?
Light residue after the main soak is normal. Re-wrap just the affected nail with a fresh acetone-soaked cotton pad for another 10 minutes rather than scraping at dry residue.
How soon can I get a new set after removal?
There’s no strict rule, but giving nails at least a few days to a week of rest with consistent cuticle oil use helps ensure a healthier base for the next application, especially if any thinning occurs.
Is non-acetone remover ever effective?
Not for acrylic. Non-acetone formulas are designed for regular polish and aren’t strong enough to break down the polymer structure in acrylic nails, regardless of soak time
Conclusion
Taking off acrylic nails at home doesn’t have to be a battle between your patience and your nail health. The safest path is really just four steps repeated with care: break the seal coat, soak thoroughly in pure acetone, remove the softened product gently, and follow up with real rehydration. Every mistake covered in this guide thinning, peeling, irritation traces back to skipping one of those steps or rushing through it.
If there’s one habit worth taking away from all of this, it’s patience over speed. Acetone needs time to fully break down the polymer bond, and no amount of scraping, filing, or prying can substitute for that chemical process. When product resists, the answer is almost always to re-wrap and wait a little longer, not to push harder.
It’s also worth giving your nails an occasional breather between sets, even just a week or two. Natural nails that get continuous cycles of acrylic application and removal without any rest tend to stay thinner and more prone to damage than nails that get periodic recovery time.
Whether you’re removing acrylics because your set has grown out, you’re switching styles, or you’re taking a break from enhancements altogether, the goal is the same: healthy nails underneath once the polish and product come off. Follow the soak, resist the shortcuts, and your natural nails will thank you for it.
If you found this guide helpful, you might also want to check out how gel removal compares, or tips for strengthening nails during a break from enhancements.

Sylvia Plath was an influential American poet and novelist, known for confessional intensity, The Bell Jar, haunting imagery, and lasting literary legacy, celebrated worldwide at punsora.com by readers scholars alike.