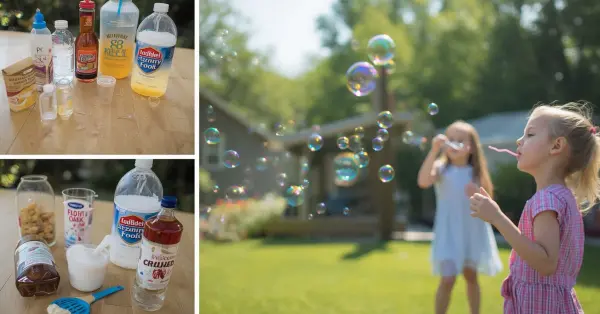
There’s a certain kind of magic in watching a bubble drift through the air catching sunlight, wobbling as it floats, then vanishing in a soft pop. It’s a simple pleasure, but one that never really gets old, whether you’re five years old or fifty. What most people don’t realize is that the bubbles you can buy at the store are often a pale imitation of what’s possible. Thin, quick to pop, and diluted for shelf stability, store-bought solutions just can’t compete with a well-made homemade batch.
The good news is that making your own bubble solution is remarkably easy, inexpensive, and endlessly customizable. With a handful of common household ingredients and a little bit of science on your side you can create bubbles that are bigger, stronger, and longer-lasting than anything off the shelf. This guide walks through everything you need to know, from the chemistry behind a good bubble to recipes for every skill level.
The Science of Bubbles
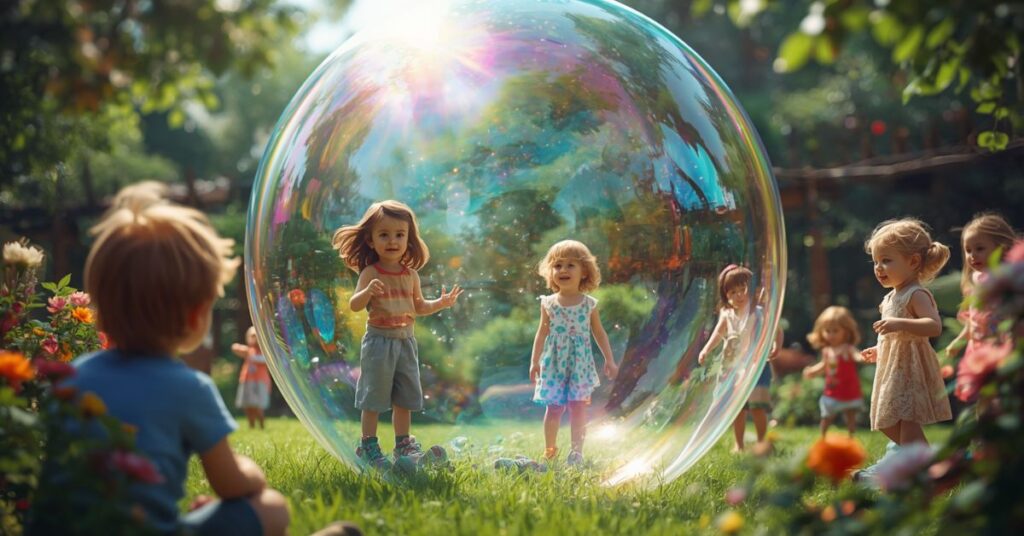
Bubbles seem simple, but there’s real chemistry behind why they form at all and why some last longer than others. Plain water can’t hold a bubble because its surface tension is too strong and too rigid; the water molecules cling tightly together, collapsing almost instantly instead of stretching into a thin film. This is where soap comes in. Soap molecules have a unique structure: one end is attracted to water, while the other end repels it. When soap is added, these molecules wedge themselves between water molecules, weakening the surface tension just enough to let it stretch and flex without breaking.
This creates a thin, elastic film essentially a sandwich, with a layer of water trapped between two layers of soap molecules. That structure is what allows a bubble to hold its round shape and bounce back slightly when disturbed.
Glycerin or sugar takes this a step further. These ingredients slow down evaporation, keeping the water layer intact longer so the bubble doesn’t dry out and pop prematurely.
External conditions matter too. Bubbles thrive in humid air, where evaporation is slower, and struggle in dry, windy, or very hot conditions. Altitude and air pressure can also subtly affect how bubbles form and float. Understanding this science isn’t just interesting trivia it directly explains
Core Ingredients Deep Dive

Every great bubble solution comes down to three key ingredients, each playing a distinct role.
Water is the base, but not all water is equal. Distilled water is ideal because it’s free of minerals that can weaken the bubble film. Tap water works fine in most areas, but if your water is especially hard (high in calcium or magnesium), you may notice weaker, less consistent bubbles. Filtered water is a good middle ground if distilled isn’t available.
Dish soap is the true workhorse. Not all brands perform equally Dawn and Joy are widely favored by bubble enthusiasts because of their concentrated surfactants, which create a stronger, more elastic film. Avoid soaps with added moisturizers or lotions, as these can interfere with bubble formation.
Glycerin is the secret ingredient serious bubble-makers swear by. It slows evaporation, keeping the soap film flexible and durable for longer. It’s inexpensive and available at most pharmacies or craft stores.
If glycerin isn’t on hand, corn syrup or sugar make solid substitutes, offering similar stabilizing effects, though results can be slightly stickier or less consistent.
For those experimenting further, advanced recipes sometimes include cornstarch, baking powder, or gelatin. These additives can increase elasticity and bubble strength, though they require more careful mixing and are typically reserved for giant-bubble or competition-level recipes.
Together, these ingredients determine not just whether a bubble forms, but how big, strong, and long-lasting it will be.
Recipes by Skill Level
Different occasions call for different bubble solutions. Here are variations to match your needs.
Colored Bubble Recipe: Add a few drops of food-safe, water-based coloring to the basic recipe. Note that true “colored” bubbles are difficult to achieve without staining surfaces, so this works best on grass or pavement you don’t mind marking temporarily.
Cold-Weather/Freeze Bubble Recipe: In freezing temperatures, use a higher glycerin ratio (2 tablespoons per cup of soap) to help bubbles freeze mid-air rather than popping, creating a fascinating crystallized effect.
Step-by-Step Mixing Instructions
Getting the mixing process right matters just as much as the ingredients themselves. Rushing this step is one of the most common reasons homemade bubble solution underperforms.
Step 1: Measure Precisely. Use consistent measuring tools for water, soap, and glycerin. Even small ratio changes can noticeably affect bubble strength.
Step 2: Combine Gently. Pour water into your container first, then add the soap. Stir slowly and gently in one direction vigorous stirring or shaking introduces excess foam and air bubbles, which actually weaken the solution rather than strengthen it.
Step 3: Add Stabilizers Last. Once water and soap are combined, stir in glycerin, corn syrup, or sugar. Mix just enough to incorporate it fully.
Step 4: Let It Rest. This is the step most people skip, and it’s the most important. Cover the container and let the solution sit for at least 4-6 hours, ideally overnight. Resting allows the soap and stabilizer molecules to fully bind with the water, resulting in a noticeably stronger film.
Step 5: Store Properly. Keep the solution in a sealed, airtight container away from direct sunlight and heat. Properly stored, homemade bubble solution can last several weeks, sometimes longer.
Step 6: Skim Before Use. If foam has settled on top after resting, skim it off before use. Foam reduces the quality of your bubbles without adding any benefit.
Following these steps consistently is often the difference between mediocre bubbles and genuinely impressive ones.
Tools & Equipment
The right tools can make an enormous difference in bubble size, shape, and consistency sometimes even more than the solution itself.
DIY Bubble Wands: You don’t need to buy anything special to get started. Pipe cleaners bent into loops, the rims of plastic cups, slotted spoons, and even your own hands (when properly soaped) can all produce great bubbles. Larger loops generally produce bigger, slower-floating bubbles, while smaller loops create quicker, more numerous ones.
Store-Bought vs. Homemade Wands: Store-bought wands are convenient and often designed with tested proportions, but they’re rarely necessary. A wand fashioned from wire and cloth, for instance, can outperform many store-bought versions because the fabric holds more solution.
Giant Bubble Wands and Ropes: For oversized bubbles, wands made from two wooden dowels connected by cotton rope work exceptionally well. The rope holds a large volume of solution, and pulling it slowly through the air creates massive, floating bubbles. These setups pair best with the “super strength” recipe.
Bubble Machines: Automatic bubble machines are popular for parties and events, but not all homemade solutions are compatible. Machines require thinner solutions to avoid clogging; if using homemade solution in a machine, dilute it slightly and skip thicker additives like cornstarch or gelatin, which can gum up the mechanism.
Troubleshooting Guide
Even with a solid recipe, bubble-making doesn’t always go as planned. Here’s how to diagnose and fix the most common issues.
Bubbles Pop Too Fast: This is usually caused by too little glycerin or a solution that hasn’t rested long enough. Try adding an extra teaspoon of glycerin and letting the mixture sit for several more hours. Dry or windy weather can also cause rapid popping, regardless of recipe quality.
Solution Won’t Foam or Form a Film: If bubbles won’t form at all, the soap-to-water ratio is likely too low. Add a bit more dish soap, a tablespoon at a time, until the wand consistently produces a film.
Bubbles Come Out Cloudy or Streaky: This is often a mineral issue from tap water. Switching to distilled or filtered water usually resolves it. Cosmetically it looks different, but cloudy bubbles aren’t necessarily weaker.
Bubbles Are Small or Won’t Grow: This can point to overly vigorous mixing, which introduces excess air and foam. Remix gently and skim any foam before use.
Solution Smells Off After Storage: A sour or unusual smell after a few weeks suggests bacterial growth, especially if tap water was used. Discard and remake with fresh, ideally distilled, water.
Bubbles Fail in Hot or Windy Conditions: Even a perfect solution struggles in extreme weather. Try bubble-making in early morning or evening when humidity is higher and wind is calmer.
Most issues trace back to ratio imbalance, insufficient resting time, or weather all easily corrected with small adjustments.
Tips & Tricks From Bubble Enthusiasts

Experienced bubble-makers rely on a handful of tried-and-true techniques that go beyond the basic recipe to consistently produce bigger, more impressive results.
For Giant Bubbles: Dip your wand slowly and fully submerge it, then pull it out with a slow, steady motion rather than a quick jerk. Sudden movements tend to tear the film before a bubble can fully form. Gentle, sweeping arm motions rather than blowing tend to produce the largest bubbles with rope-style wands.
For Bubble-in-Bubble Tricks: Wetting your hands or gloves with bubble solution allows you to gently poke a finger into a large bubble without popping it, creating a smaller bubble inside. This works best with the “unpoppable” recipe, since the extra elasticity holds up under contact.
For Bouncing Bubbles: Wearing clean cotton gloves dipped in solution lets bubbles bounce off your hands instead of popping on contact. Bare skin has natural oils that break the bubble film almost instantly, so gloves are essential for this trick.
Timing Matters: Early morning and early evening tend to offer the best bubble-making conditions, thanks to higher humidity and calmer air. Midday sun and heat accelerate evaporation, shortening bubble life significantly.
Practice the Pull: For giant bubbles, practice pulling the wand upward and slightly backward in one continuous motion. This technique, more than any recipe tweak, is often what separates casual bubble-makers from those who can consistently produce huge, long-floating bubbles.
Safety Considerations

While bubble solution is generally safe, a few precautions help keep the experience enjoyable and worry-free, especially for children and pets.
Child Safety: Bubble solution isn’t meant to be ingested, and while a small accidental taste isn’t usually dangerous, swallowing larger amounts can cause stomach upset. Supervise young children closely, and consider using a tear-free recipe (with baby shampoo instead of dish soap) for kids who tend to get solution near their eyes or mouths. If the solution does get into your eyes, rinse thoroughly with clean water.
Pet Safety: Dogs and cats are often fascinated by bubbles, but standard dish soap solution can cause mild irritation if pets lick it off fur or the ground. If pets will be nearby, consider using pet-safe, fragrance-free soap in your recipe, and rinse any solution off outdoor surfaces or toys afterward.
Surface Safety: Bubble solution can make grass, tile, wood decking, and other surfaces slippery. This is especially important at parties or events where people are walking or playing nearby. Wipe up spills promptly and avoid bubble play directly on hard, smooth surfaces like polished floors or pool decks where slipping is more likely.
Allergy Considerations: Some individuals may have sensitivities to certain dish soap fragrances or dyes. If allergies are a concern, opt for unscented, dye-free soap as a base.
Storage Safety: Keep bubble solution out of reach of small children when not in use, and label containers clearly, especially if stored in a repurposed bottle that previously held something else.
Creative Uses & Variations

Bubble solution isn’t just for casual backyard play with a little creativity, it can be adapted for parties, photography, and seasonal fun.
Bubble Solution for Parties and Events: Bubbles make a memorable addition to birthday parties, weddings, and outdoor gatherings. Setting up a “bubble station” with several wand sizes and a large batch of solution lets guests of all ages join in. For weddings, small bottles of bubble solution are a popular alternative to confetti or rice for send-offs, since they’re mess-free and photograph beautifully.
Bubble Solution for Photography: Bubbles catch light in a way that makes them a favorite subject for photographers. Backlighting bubbles during golden hour highlights their rainbow sheen, while a dark background helps them stand out in sharp contrast. Slow-motion video is especially popular for capturing the moment a bubble pops.
Seasonal and Holiday-Themed Bubbles: Adjust your recipe to match the season. Cold-weather freeze bubbles create a magical crystallized effect in winter, while colored bubbles work well for spring or summer celebrations. For Halloween, orange or purple-tinted bubbles add a festive touch, and for winter holidays, adding a bit of extra glycerin helps bubbles hold up better in cooler outdoor air.
Sensory and Educational Play: Bubble-making is also a popular hands-on science activity for kids, offering a simple, engaging way to demonstrate concepts like surface tension and elasticity while having fun outdoors.
These variations show just how versatile a simple bubble solution recipe can be, extending far beyond casual play.
Frequently Asked Questions
How long does homemade bubble solution last?
Stored in a sealed, airtight container away from heat and sunlight, homemade bubble solution typically lasts several weeks to a couple of months. If it develops an off smell or unusual color, it’s best to discard and remake a fresh batch.
Can I use hand soap instead of dish soap?
Hand soap generally isn’t ideal, as it’s formulated differently and often contains moisturizers that weaken the bubble film. Dish soap, particularly brands like Dawn or Joy, is specifically suited for strong, long-lasting bubbles due to its concentrated surfactants.
Why do my bubbles have an odd smell?
An unusual or sour smell after storage usually indicates bacterial growth, especially if tap water was used instead of distilled. This is more likely once a solution is a few weeks old. If this happens, it’s safest to discard the batch and mix a new one with fresh, ideally distilled, water.
Is homemade solution safe for sensitive skin?
Most homemade recipes are gentle, but individuals with sensitive skin may react to certain soap fragrances or dyes. Choosing an unscented, dye-free dish soap as your base reduces this risk. For young children, a tear-free baby shampoo version is a safer alternative.
Why won’t my bubbles get bigger no matter what I try?
This often comes down to technique rather than recipe: slow, steady wand movements produce larger bubbles than quick or jerky ones. Weather conditions like wind and low humidity can also limit bubble size regardless of solution quality.
Conclusion
Making your own bubble solution turns out to be far more than a simple kitchen experiment; it’s a blend of basic chemistry, careful technique, and a bit of trial and error that rewards patience with genuinely impressive results. As this guide has covered, the difference between mediocre bubbles and spectacular ones often comes down to a handful of controllable factors: the quality of water used, the right dish soap, a properly measured stabilizer like glycerin, and perhaps most importantly giving the solution time to rest before use.
Beyond the basic recipe, there’s a surprising amount of room to experiment. Whether it’s crafting an ultra-durable version for hand-bouncing tricks, adjusting ratios for giant bubble wands, or creating a gentler formula for young children, homemade bubble solution can be tailored to almost any occasion or skill level. Add in creative applications like party send-offs, photography sessions, or seasonal freeze bubbles, and it becomes clear just how versatile this simple mixture really is.
Perhaps the best part of making bubble solution at home is how accessible it is, no special equipment or expensive ingredients required, just a bit of soap, water, and patience. So the next time you’re looking for an easy outdoor activity, a unique party touch, or simply a nostalgic afternoon activity, skip the store-bought bottle and mix up a batch yourself.
Experiment with the recipes and ratios in this guide, find what works best for your climate and preferences, and don’t be afraid to adjust as you go. The perfect bubble is often just one more tweak away.
That completes all the sections. Want me to now compile everything into a single, polished blog post file with proper H2 formatting?