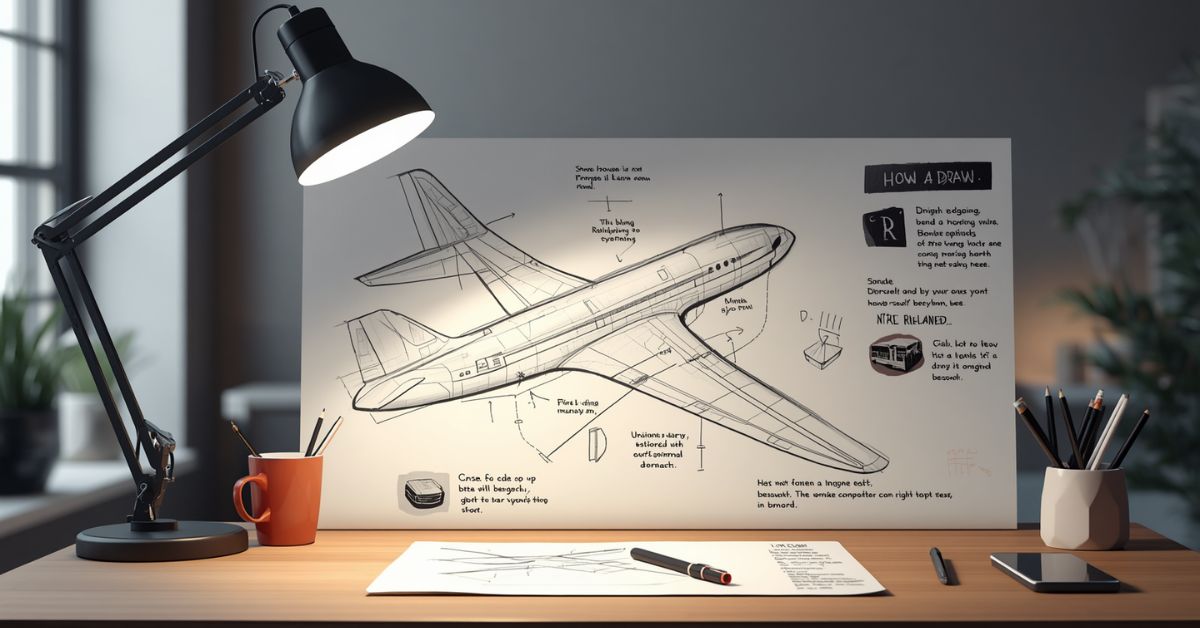
There’s something captivating about the silhouette of an airplane slicing through the sky the sleek fuselage, the sweep of the wings, the quiet power of the engines. It’s no surprise that aircraft are one of the most popular subjects for artists, hobbyists, and aviation enthusiasts alike. Yet many beginners shy away from drawing planes, assuming they require technical precision or engineering knowledge to get right.
The truth is, drawing a convincing airplane comes down to understanding a handful of basic shapes and proportions, then building up detail from there. Once you break the subject down fuselage, wings, tail, engines the process becomes far less intimidating and a lot more enjoyable.
This guide walks you through everything you need: the tools to use, the anatomy of an aircraft, and step-by-step techniques for drawing planes from multiple angles and in different styles. By the end, you’ll have the skills to sketch any aircraft with confidence.
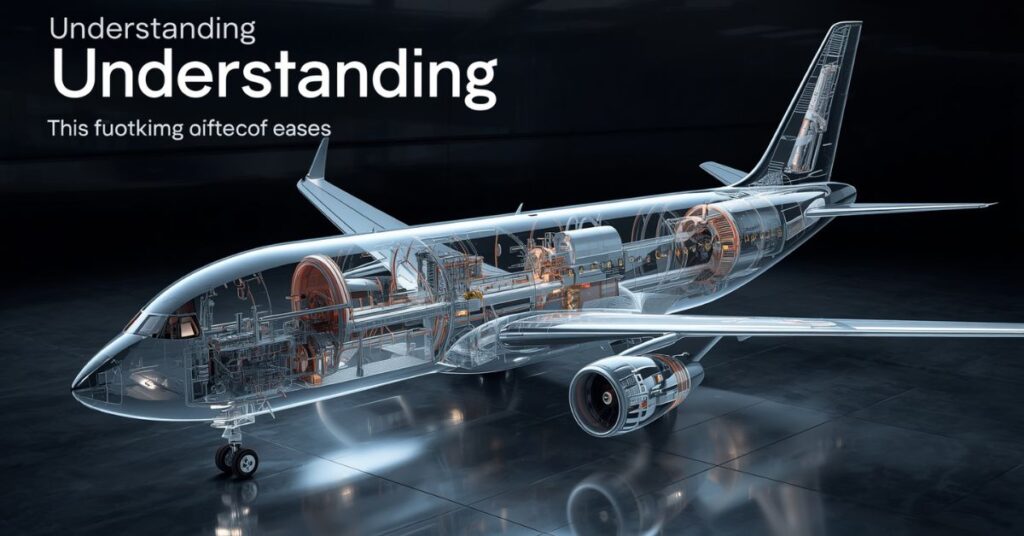
Understanding Aircraft Anatomy
Before picking up a pencil, it helps to understand what you’re actually looking at when you see an airplane. Every aircraft, regardless of size or purpose, shares a common set of structural parts and recognizing these will make your drawings far more accurate and convincing.
The fuselage is the long, central body of the plane that houses the cockpit, passengers, and cargo. It’s usually tapered at both ends, narrower at the nose and tail than in the middle.
The wings are the most defining feature, and they come in several forms: straight wings (common on small propeller planes), swept-back wings (typical of commercial jets), and delta wings (often seen on fighter aircraft). The angle and shape of the wings say a lot about the aircraft’s purpose and speed.
At the rear, the empennage, or tail section, includes the vertical stabilizer (the upright fin) and horizontal stabilizers (the small side wings), which keep the aircraft steady in flight.
Engines vary in placement mounted under the wings, attached to the fuselage, or built into the nose depending on the aircraft type. The cockpit and canopy house the pilots and are usually positioned near the front.
Finally, don’t overlook the landing gear and control surfaces like ailerons, flaps, and rudders, small details that add realism and function to your drawing.
Understanding these parts isn’t just technical trivia; it’s the foundation that makes every step afterward easier.
Tools and Materials
You don’t need an expensive art collection to start drawing airplanes, but having the right tools makes the process smoother and your results more polished.
Start with pencils. An HB pencil is great for initial construction lines since it’s light and easy to erase, while a 2B or 4B pencil works well for darker outlines and shading once your sketch is finalized. A good eraser, ideally a kneaded eraser, lets you lift graphite cleanly without smudging or damaging the paper.
For paper, a smooth sketch pad or bristol board works best, especially if you plan to ink or add detailed shading later. Rougher paper can make fine details like panel lines and rivets harder to render cleanly.
A ruler is optional but genuinely useful for keeping fuselage lines straight and wings symmetrical, especially in technical or blueprint-style drawings. Some artists also use ellipse guides or French curves to get smoother, more accurate curves for the nose, cockpit, and engine shapes.
If you want to finalize your sketch, fineliner pens or brush pens are excellent for inking clean outlines over your pencil work. For color, colored pencils, markers, or watercolors all work well depending on the finish you’re after.
If you’re working digitally, a drawing tablet paired with software like Procreate, Photoshop, or Clip Studio Paint offers more flexibility, including undo history and layering.
Lastly, keep reference photos or aircraft blueprints handy; they’re invaluable for getting proportions and details right.
Basic Proportions and Perspective
Getting an airplane to look “right” has less to do with artistic talent and more to do with proportion and perspective. This is where many beginners struggle, but a few simple habits can make a huge difference.
Start by breaking the aircraft down into basic shapes: a long cylinder or oval for the fuselage, triangles for the wings and tail, and smaller cylinders for the engines. Thinking in simple 3D forms rather than trying to draw the “whole plane” at once makes the process far more manageable.
A centerline running down the length of the fuselage is one of the most useful tools you can use. It acts as a guide for keeping both wings, engines, and stabilizers symmetrical, especially when the aircraft is viewed from an angle rather than straight on.
Understanding basic perspective is also essential. A side view uses minimal perspective, making it the easiest starting point. A three-quarter view, however, introduces foreshortening where parts of the aircraft closer to the viewer appear larger, and the wing on the far side appears shorter than the near one. Practicing one-point and two-point perspective with simple boxes and cylinders before attempting a full aircraft can build this skill faster.
Finally, keep scale relationships in mind. Wingspan-to-fuselage-length ratios vary significantly between aircraft types, so referencing real photos ensures your drawing doesn’t look stretched or squashed.
Step-by-Step: Side View
The side view is the easiest and most forgiving angle to start with, since it involves minimal perspective and keeps every part of the aircraft clearly visible.
Begin with the fuselage. Draw a long, horizontal oval or cylinder shape, tapering slightly at both the nose and tail. Keep your lines light at this stage; this is just a construction guide, not the final outline.
Next, add the cockpit. Near the front third of the fuselage, sketch a small curved bump. On commercial aircraft, this is subtle; on fighter jets or small planes, it’s often a more pronounced bubble or dome shape.
Now bring in the wings. Starting from the midpoint of the fuselage, extend a long triangular shape outward. In a side view, you’ll only see one wing clearly, with the other partially hidden behind the fuselage; a small sliver may peek out on the opposite side.
Move to the tail section. Draw a vertical fin at the rear, along with a horizontal stabilizer extending sideways. These should feel proportionate to the wings, not oversized or too small.
Add the engines as simple cylinders, positioned according to the aircraft type under the wing, on the fuselage, or at the nose.
Finally, layer in windows, doors, and landing gear. A row of small ovals along the fuselage represents windows, while small circles beneath the body and wings represent wheels.
Once the structure feels balanced, go over your final lines with more confidence and erase the guidelines underneath.
Step-by-Step: Three-Quarter View
Once you’re comfortable with the side view, the three-quarter view is a natural next step. It’s more dynamic and visually interesting, but it also introduces perspective challenges that require a bit more care.
Start by drawing the fuselage as an elongated cylinder, but this time in perspective meaning the end closer to the viewer should appear slightly larger, while the far end tapers away more sharply. A light centerline curving along the top of the fuselage helps keep the shape consistent as it recedes into the distance.
Next, place the cockpit along this curved centerline, adjusting its position so it follows the fuselage’s perspective rather than sitting flat.
For the wings, this is where foreshortening comes into play. The wing closest to the viewer will appear longer and more visible, while the far wing appears shorter and partially obscured behind the fuselage. Both wings should still align with the same central axis to avoid looking mismatched or twisted.
Add the tail section next, angling the vertical stabilizer and horizontal stabilizers to match the fuselage’s perspective. A common mistake here is drawing the tail as if it were still a flat side view to check that it “wraps” around the form correctly.
Finally, layers in engines, windows, and landing gear, making sure elements closer to the viewer are drawn slightly larger than those farther away.
This angle takes practice, but it rewards you with a far more lifelike, three-dimensional result.
Step-by-Step: Front and Rear Views
Front and rear views are less commonly attempted by beginners, but they’re excellent for understanding an aircraft’s true three-dimensional form and they add valuable variety to your drawing skills.
Start with the fuselage cross-section. Rather than a long horizontal shape, you’re now drawing the aircraft head-on, so the fuselage appears as a rounded or oval shape, wider at the bottom and narrowing slightly toward the top. Think of it as slicing the plane and looking straight into that cross-section.
Next, add the cockpit, positioned at the top of the fuselage, often as a small curved bump or a flattened dome, depending on the aircraft type.
Now bring in the wings. This is where dihedral the upward angle at which wings extend from the fuselage becomes important. Most aircraft wings tilt slightly upward for stability, so avoid drawing them perfectly flat and horizontal, which can make the plane look unrealistic or toy-like.
Add the engines next, positioned symmetrically on either side beneath the wings, or centered if drawing a single-engine aircraft. From the front, engines appear as simple circles or ovals with a hollow center representing the intake.
Finally, include the landing gear, visible as small wheels beneath the fuselage and wings, and consider adding subtle shading to suggest the rounded form of the fuselage.
For the rear view, follow the same structure, but position the tail’s vertical and horizontal stabilizers prominently, since they become the dominant visual feature from behind.
Drawing Different Aircraft Types
Once you’ve mastered the fundamentals, you’ll notice that different aircraft types follow the same basic structure but vary significantly in proportion and detail. Learning these differences will expand your range as an artist.
Commercial jets typically have long, cylindrical fuselages with swept-back wings and two or four engines mounted underneath. Narrow-body aircraft (like short-haul jets) have a slimmer fuselage, while wide-body jets (used for long-haul flights) are noticeably bulkier, often with two aisles and a more rounded cross-section.
Fighter jets are sleeker and more angular, with sharp noses, smaller cockpits, and wings that are often delta-shaped or heavily swept for speed and agility. Their fuselages tend to hug the engines tightly, giving them a more compact, aerodynamic silhouette compared to commercial aircraft.
Propeller planes vary widely; single-engine aircraft usually have a propeller mounted at the nose, a compact fuselage, and straight wings, while twin-engine models mount propellers on the wings themselves, giving a wider stance.
Military transport and cargo planes are boxier and more utilitarian, with high wings, a wide fuselage for cargo capacity, and a rear loading ramp instead of a pointed tail.
Vintage and WWII-era aircraft often feature exposed rivets, tailwheel landing gear (taildraggers), and rounded, less streamlined fuselages compared to modern jets.
If helicopters fall within your scope, note that they differ fundamentally: no fixed wings, a rotor system on top, and often a tail rotor for stability.
Adding Detail and Realism
Once your basic aircraft structure is in place, details are what transform a simple outline into a convincing, realistic drawing. This stage rewards patience and close observation of reference photos.
Start with windows. On commercial aircraft, these appear as a neat row of small ovals or rounded rectangles running along the upper fuselage, evenly spaced. Cockpit windows are larger and more angular, wrapping slightly around the nose.
Next, add panel lines and rivets. Real aircraft are built from multiple metal panels joined together, creating subtle seams along the fuselage and wings. Adding faint lines here without overdoing it gives your drawing a more industrial, believable texture. Small dots along these seams can suggest rivets, especially on vintage aircraft.
Engine details matter too. Add intake fans at the front of jet engines and exhaust nozzles at the rear. For propeller planes, carefully render the blades, often as a soft blur if suggesting motion.
Don’t forget smaller elements like antennas, sensors, and pitot tubes have thin protrusions near the nose or fuselage that are easy to overlook but add authenticity.
Finally, consider the aircraft’s livery: paint schemes, airline or military logos, and registration numbers along the fuselage or tail. These details not only add realism but also give your drawing personality and context, whether you’re illustrating a commercial airliner or a fictional aircraft of your own design.
Small details like these are what separate a generic plane sketch from one that feels genuinely alive.
Shading, Lighting, and Materials
Shading is what gives your airplane drawing depth and dimension, transforming a flat outline into something that feels solid and three-dimensional. The key is understanding light and how it interacts with metallic, curved surfaces.
Start by establishing a light source. Decide where the light is coming from typically above and slightly to one side and stay consistent with this direction throughout the drawing. This determines which areas of the fuselage, wings, and engines will appear bright versus shadowed.
Aircraft surfaces are largely metallic, so shading should reflect that. Rather than smooth, gradual gradients, metallic surfaces often show sharper contrasts between light and shadow, along with subtle reflected light bouncing off nearby surfaces. Curved areas like the fuselage and engine cowlings should have a highlight where light hits directly, transitioning to a darker midtone, and finally a reflected light near the very edge.
Don’t forget the cast shadow on the ground beneath the aircraft this anchors the plane visually and reinforces the sense of it existing in physical space.
Adding reflections on glossy areas, like the cockpit canopy or polished fuselage sections, enhances realism further. Even a few simple streaks of light can suggest a reflective surface convincingly.
For added realism, consider weathering effects, subtle scratches, grime near the engines, or exhaust stains along the fuselage. These imperfections, when used sparingly, make an aircraft feel used and authentic rather than sterile or artificial.
Color and Rendering Techniques
Once your shading is in place, color brings your aircraft drawing fully to life. The techniques you choose depend on whether you’re working traditionally or digitally, but the underlying principles remain the same.
For traditional media, colored pencils allow for smooth, controlled blending and are great for building up metallic tones gradually. Markers work faster and are excellent for bold, saturated liveries, though they require confident strokes since mistakes are harder to correct. Watercolor and gouache can produce beautiful atmospheric effects, especially for skies and clouds, but demand more practice to control.
If you’re working digitally, software like Procreate, Photoshop, or Clip Studio Paint offers far more flexibility. Layering allows you to separate base colors, shading, and highlights, making adjustments easy without redrawing. Blending tools and airbrush-style brushes are particularly useful for replicating the smooth, reflective quality of metal surfaces.
When choosing colors and liveries, decide whether you’re recreating a specific airline or military scheme or designing something original. Real liveries often follow strict brand guidelines, so referencing photos ensures accuracy if realism is your goal.
Finally, consider the background. A simple sky with soft clouds can dramatically enhance your aircraft drawing, adding atmosphere and context. Using an atmospheric perspective slightly desaturating and lightening distant elements helps create a sense of depth, making the aircraft feel like it’s genuinely suspended in open air rather than floating on a blank page.
Thoughtful color choices, paired with solid shading, are what elevate a drawing from technically correct to visually compelling.
Common Mistakes and How to Fix Them
Even with a solid understanding of anatomy and technique, certain mistakes tend to show up repeatedly, especially among beginners. Recognizing these early can save a lot of frustration.
One of the most common issues is asymmetrical wings. If one wing appears longer, wider, or angled differently than the other, the entire drawing can look off-balance. The fix is simple but essential: always use a centerline down the fuselage and measure both wings against it before finalizing your linework.
Another frequent problem is incorrect proportions, particularly a fuselage that’s too short or too long relative to the wingspan. This often happens when artists rush the construction phase. Referencing real photos or blueprints, even loosely, helps calibrate these proportions before adding detail.
A flat-looking perspective is especially common in three-quarter or angled views. This usually happens when foreshortening is ignored, causing the aircraft to look like a flattened side view rather than a three-dimensional object. Practicing basic perspective with simple cylinders and boxes before attempting a full aircraft can significantly improve this.
Finally, many beginner drawings suffer from an overly stiff or “clip-art” appearance. This often results from overly clean, uniform linework with no variation in weight or texture. Introducing subtle line-weight variation, thicker lines for closer or shadowed edges, thinner lines for distant or brightly lit ones adds a more organic, hand-drawn quality.
Being aware of these pitfalls, and actively checking for them as you draw, will steadily improve the accuracy and appeal of your aircraft illustrations.
Practice Exercises
Like any skill, drawing airplanes convincingly comes down to consistent, deliberate practice. These exercises are designed to build your confidence and speed while reinforcing everything covered so far.
Start with gesture drawing. Set a timer for just one or two minutes and quickly sketch an aircraft’s basic form fuselage, wings, and tail without worrying about detail. This trains your eye to capture proportion and structure quickly, which is especially useful when experimenting with different angles or aircraft types.
Next, practice copying reference photos. Choose a variety of aircraft: commercial jets, fighter planes, propeller aircraft and recreate them as closely as possible. Pay close attention to proportions, wing angles, and how perspective changes the shape of the fuselage. This exercise builds observational skills that pure imagination can’t replace.
Once you’re comfortable, challenge yourself to draw from memory. After studying a reference photo for a minute or two, put it away and attempt to recreate the aircraft using only what you remember. This reveals gaps in your understanding and helps information stick more permanently.
Finally, try speed sketching challenges. Set a short time limit, such as five or ten minutes, and draw as many different aircraft as possible within that window. This builds fluency, reduces hesitation, and helps you internalize proportions so thoroughly that you no longer need to consciously think through each step.
Tips for Different Skill Levels
Not every artist wants the same outcome from drawing airplanes, and your approach should shift depending on your goals and current skill level.
For beginners and younger artists, a simplified or cartoon style is the best starting point. Focus on clean, bold shapes rather than technical accuracy, a rounded fuselage, simple triangular wings, and a friendly cockpit window are often enough to create an appealing, recognizable aircraft. Don’t worry about proportions being perfectly realistic at this stage; the goal is building confidence and enjoying the process.
For hobbyists and aviation enthusiasts, a more technical or blueprint-style approach works well. This involves careful attention to accurate proportions, panel lines, and structural details, often referencing real schematics or three-view diagrams. This style is especially popular among model aircraft builders and those who enjoy precision and technical accuracy over artistic flourish.
For advanced artists aiming for realistic aviation art, the focus shifts toward mastering lighting, shading, and atmosphere. This means studying how light interacts with metal surfaces, understanding reflections and weathering effects, and incorporating dynamic compositions like dramatic angles, motion blur, or environmental storytelling such as an aircraft flying through clouds or on a runway at sunset.
Regardless of your level, the key is matching your technique to your goals. A child’s drawing doesn’t need rivets and panel lines, just as a technical illustration doesn’t need dramatic lighting. Understanding this distinction helps you focus your effort where it matters most for the result you’re after.
Conclusion
Drawing an airplane may seem like a daunting task at first, but as this guide has shown, it becomes remarkably approachable once broken down into manageable steps. From understanding basic aircraft anatomy to mastering perspective, shading, and fine detail, each stage builds naturally on the last, gradually transforming a simple outline into a convincing, dynamic illustration.
The key takeaways are worth revisiting: start with basic shapes and a strong centerline for symmetry, pay close attention to proportions, and don’t rush the construction phase before adding detail. Whether you’re working in a side view, a dynamic three-quarter angle, or tackling a front-facing perspective, patience and consistent reference to real aircraft will always improve your results.
Equally important is recognizing that mastery doesn’t happen overnight. The practice exercises outlined earlier gesture drawing, copying references, drawing from memory, and speed sketching are designed to be revisited regularly, not just attempted once. Small, consistent effort compounds significantly over time.
As you grow more confident, don’t hesitate to experiment. Try different aircraft types, explore various artistic styles, and push into more advanced techniques like weathering, dramatic lighting, or full-color renderings. Aviation offers an incredibly rich subject matter, from sleek modern jets to nostalgic vintage aircraft, ensuring you’ll never run out of new challenges.
Ultimately, the most important step is simply to keep drawing. With regular practice and a willingness to learn from mistakes, you’ll soon find yourself sketching airplanes with the same ease and confidence as any seasoned aviation artist.